
 Pin it
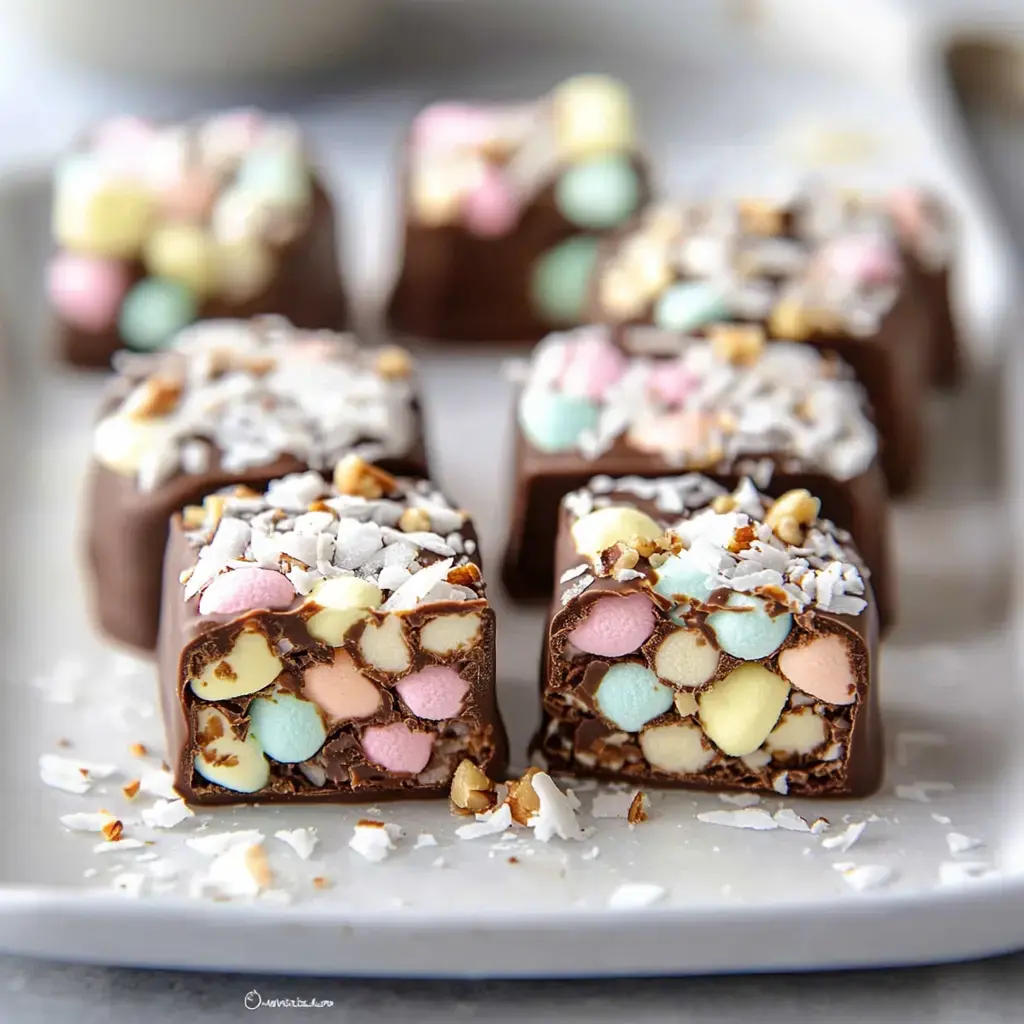
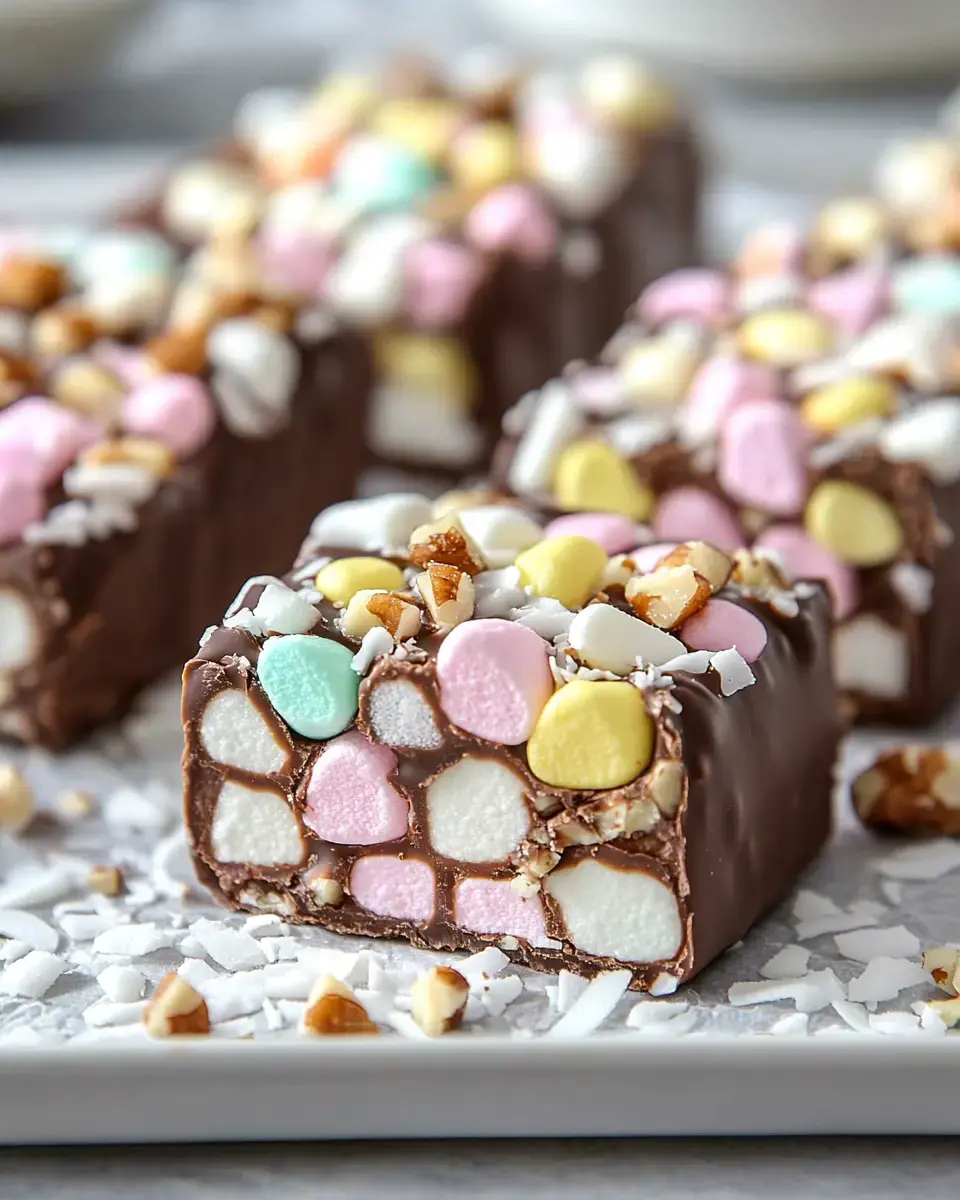
I gotta tell you about my all-time Christmas sweet treat! This no-bake Church Window Cookie tradition runs deep in my family. They're super simple to whip up, but wow—they look amazing with those bright marshmallows showing through like gorgeous glass windows. Every time I bring these treats to gatherings, people beg me for my secret!
What Makes These So Awesome
The magic of these treats? They seem fancy but couldn't be easier to make. That beautiful window effect just happens as you cut each slice! My grandma showed me how to make these when I was tiny, and now I do it with my own children. Everyone falls in love with the combo of colorful marshmallows, smooth chocolate and the nutty crunch.
Your Shopping List
- Shredded Coconut: Grab sweetened flakes for the best results.
- Colorful Mini Marshmallows: These tiny rainbow bits create the stunning window look.
- Chopped Walnuts: Give them a quick toast to bring out their flavor.
- Quality Chocolate: I prefer using melt-friendly wafers for smooth results.
Creating Your Sweet Windows
- Setup Steps
- Begin by spreading coconut strips onto parchment paper. This creates the base where your cookie logs will roll.
- Melt With Care
- Go slow when melting your chocolate—quick 30-second microwave bursts work best. Patience pays off here.
- Combine Everything
- Toss your rainbow marshmallows with nuts, then pour chocolate over them. It gets sticky but that's part of the fun!
- Shape Your Logs
- Now comes my favorite bit—rolling these gooey mixtures into neat logs using the coconut base.
- Cool Completely
- Stick your logs in the refrigerator until they're completely firm to touch.
- Cut And Enjoy
- When you're ready to eat, slice them up and watch everyone's surprise!
Tricks I've Learned
After countless batches over the years, here's what works: don't rush the chocolate melting or you'll mess up the texture. Set up your coconut strips neatly for the prettiest outcome. And really let them chill enough—at least a few hours makes all the difference. The wait is totally worth it!
 Pin it
Fun Variations
You can switch things up so many ways! Try swapping walnuts for pecans or leave out nuts completely for allergy-friendly versions. Instead of coconut coating, roll them in fun sprinkles or crushed graham crackers. During the holidays, I sometimes add a drop of peppermint flavor—it gives them such a festive taste!
Storage Secrets
These goodies stay good in your fridge for about 5 days. I love making them ahead for get-togethers. Just wrap the logs tightly and cut them right before you serve them for the most impressive look. If you somehow don't finish them all (unlikely!), any sliced pieces will stay tasty in the fridge for a couple more days.
Frequently Asked Questions
- → Why cool it before cutting?
Chilling makes slicing easier and keeps marshmallows from tearing apart.
- → Can I use other nuts?
Absolutely! Chopped pecans or almonds work great too.
- → What’s with the spatula spray?
It helps stop the mixture from sticking and makes it easier to mix.
- → Can I freeze these?
Yes! Wrap them tightly, freeze for up to three months, and thaw in the fridge before slicing.
- → Why pick candy melts?
They set firm at room temperature and don’t melt as quickly as regular chocolate.