
 Pin it
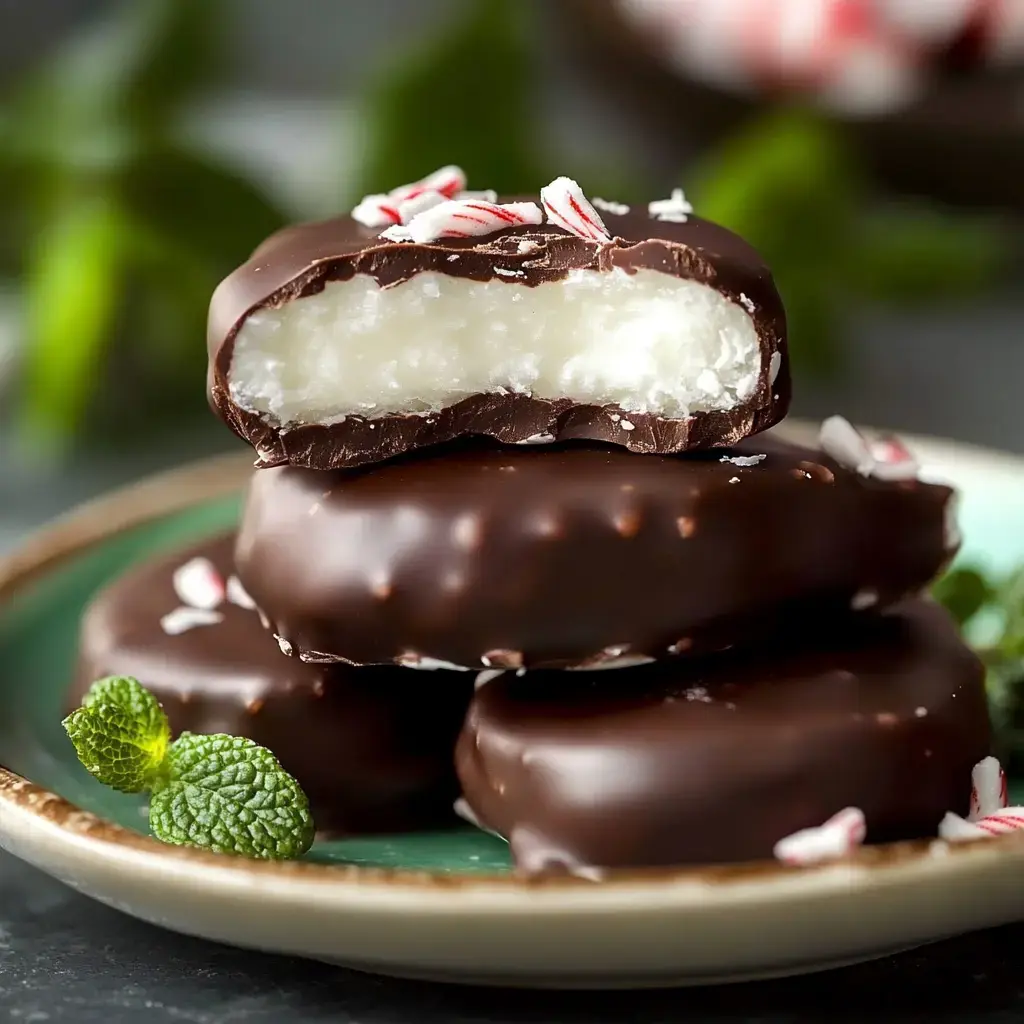
Want to whip up incredible homemade mint chocolate treats? These delightful minty bites are way simpler to make than you might guess! If you're hungry for that refreshing mint and chocolate combination or need a perfect handmade gift, this guide walks you through creating these tempting goodies right at home.
Benefits of Homemade Versions
Have you ever munched on a mint patty and wondered if you could create them yourself? Good news—you totally can! These DIY treats aren't just tasty - they're actually enjoyable to prepare. There's also something extra meaningful about giving someone a box of candies you made from scratch. Once you try making these cool, minty snacks, you'll forget all about the packaged ones.
Ingredients List
- Powdered Sugar: 4 cups, fully sifted for perfectly smooth centers
- Evaporated Milk: 3 tablespoons to get that silky consistency
- Light Corn Syrup: 3 tablespoons which binds everything nicely
- Coconut Oil: 2 tablespoons, softened until creamy
- Peppermint Oil: 1/4 teaspoon (or swap with 1 teaspoon extract)
- Dark Chocolate: 12 ounces premium quality for coating
- Candy Canes: 2-3 smashed (if desired) for garnish
Creating Your Sweet Treats
- Prepare Your Filling
- Combine powdered sugar, milk, corn syrup, coconut oil, and peppermint until the mixture feels similar to modeling clay. If it sticks too much, sprinkle in extra powdered sugar.
- Form Your Base
- Divide the mixture in two, wrap with plastic, and cool for 30 minutes. This step makes handling so much easier!
- Flatten and Shape
- Sprinkle powdered sugar on your work surface, flatten the dough to 1/4-inch thickness, then cut circles. A small round cutter or bottle cap works perfectly.
- Chill Thoroughly
- Stick those rounds in the freezer for 30 minutes - this step is essential for smooth chocolate coating!
- Prepare Chocolate
- Gently melt your chocolate in the microwave, giving it a stir every half minute. Take your time - rushed melting ruins chocolate!
- Coat and Top
- Lower each frozen piece into chocolate using a fork. Gently tap away extra chocolate, place on parchment, and sprinkle with candy cane bits for a festive touch.
- Cool Completely
- Allow them to harden for about an hour at room temperature. It's hard to wait, but totally worth it!
Unique Qualities
Making candy at home brings a special kind of joy. Your kitchen gets filled with that wonderful mint aroma, and you can adjust exactly how minty or sweet they turn out. Plus, homemade ones taste much fresher and creamier than anything pre-packaged.
Mastering the Filling
The real trick to outstanding mint patties comes down to that smooth center. It needs to be sturdy enough to handle but soft enough to melt when eaten. When your mix seems too sticky, just work in more powdered sugar. If it's crumbly, a tiny bit of milk will smooth things out.
Simple Chocolate Coating
Don't worry about the coating process! Here's a handy trick: keep your patties ice-cold and your chocolate just melted. Dunk with a fork, tap off the drips, and slide onto parchment. And if things get messy? Well, that's why taste-testing exists!
Beautiful Presentation
These sweet treats deserve proper display! Put parchment in a nice container, arrange them carefully, and add a colorful ribbon. They work wonderfully as gifts - assuming you don't gobble them all first!
Storage Tips
Keep your treats in the fridge up to seven days (though they'll probably vanish before then!). Need to make them ahead? They can stay in the freezer for a full month. Just let them thaw in your fridge when you're craving a cool minty snack.
 Pin it
Frequently Asked Questions
- → Can I use different mint?
Regular extract works too. It's milder than oil though. Add tiny amounts. Sample as you mix. Too much can't be undone.
- → How to melt chocolate properly?
Use quick microwave bursts. Mix thoroughly between. Keep water away. Don't leave unattended. Taking your time works best.
- → How to store them?
Refrigerator works great. Seal them tightly. They'll last several weeks. Layer with parchment. If anyone leaves them uneaten!
- → Can I make them thicker?
Don't flatten as much. Keep diameter consistent though. They'll still dip nicely. You might use extra chocolate. Cooling takes more time.
- → What if I don't have a cookie cutter?
A drinking cup works too. Hand-shaping is fine. Maintain uniform size. Whatever's handy. Taste stays delicious.
- → What if they're too soft?
Add extra sugar. Reduce butter if needed. Cool them longer. Keep everything cold. Fixes the problem quickly.
- → Can I transport them?
Transport them chilled. Use containers with walls. Put paper between layers. Consider a cold pack. Maybe bring backup sweets.
- → How to make them quicker?
Quick freezing helps. Get ingredients ready. Dip them fast. They still need setting time. The wait's worth it.
- → Can I make larger amounts?
Doubling works well. You'll need extra room. Allow more cooling time. Keep ingredients cold. They make lovely gifts.
- → How to add more mint flavor?
Add gradually. Concentrated stuff works best. Sample continuously. Too much can't be fixed. Fresh mint makes nice garnish.
- → Why isn't my chocolate smooth?
Melt more gradually. Mix more frequently. Filter out any chunks. Maybe start over. Worth doing correctly.
- → Why are my centers sticky?
Add more powdered sugar. Cool them longer. Work with cool hands. Sprinkle sugar on surface. Being patient really helps.
Conclusion
Enjoyed these? Give mint cookies a shot next. Or try chocolate mint bark. Both make wonderful presents.