
 Pin it
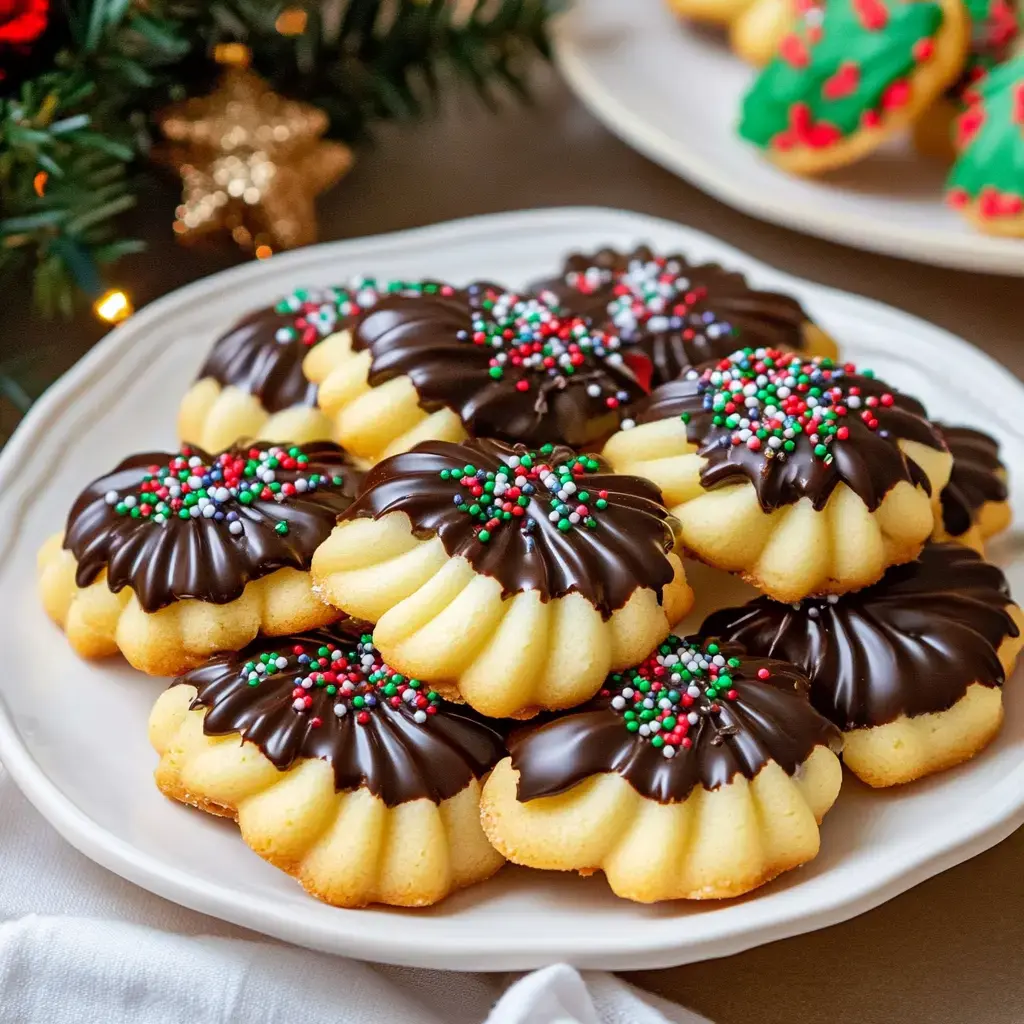
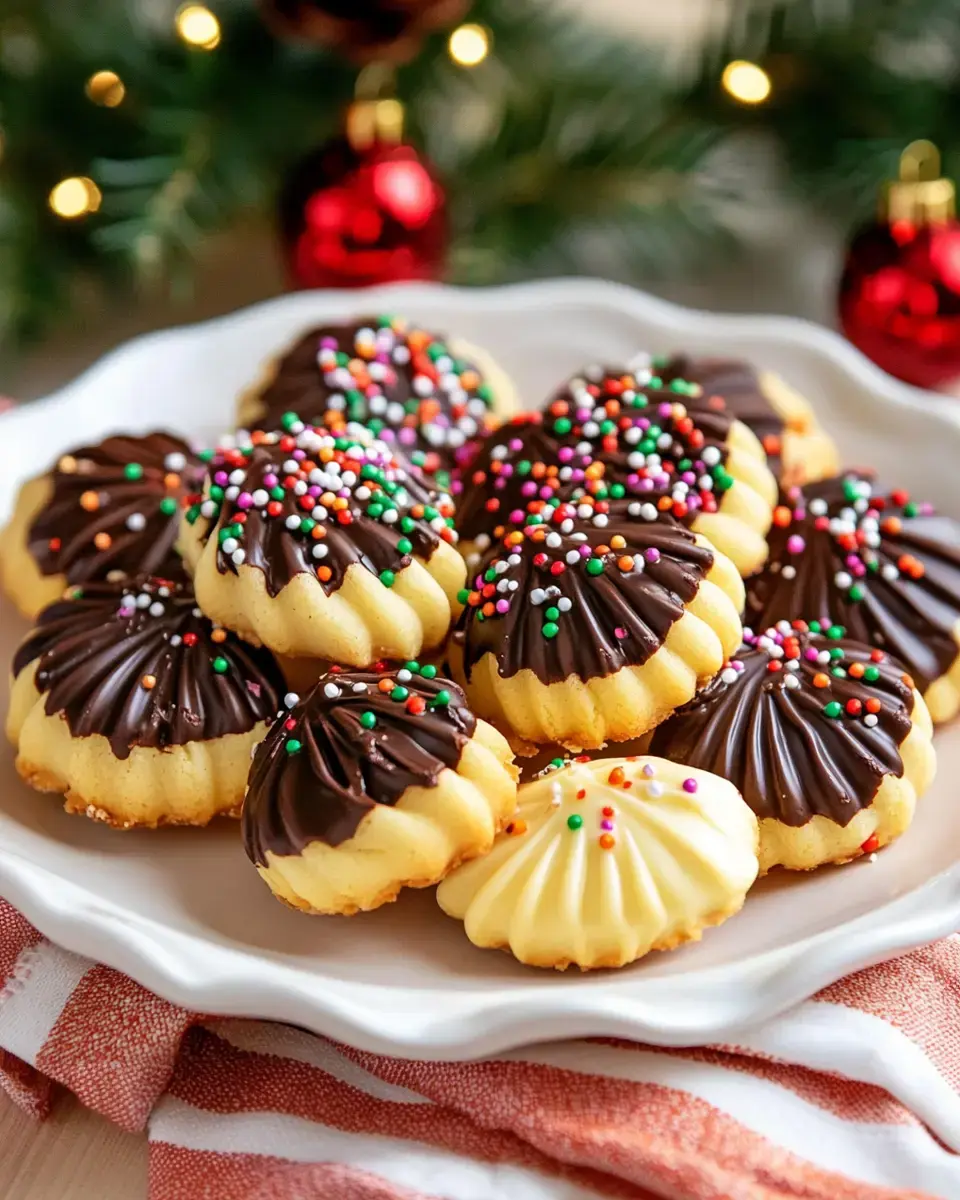
Nothing beats these melt-in-your-mouth holiday butter cookies for bringing back cherished memories! I first started baking them with my mom as a kid, and now my family can't imagine Christmas without them. What's so great? You don't need to wait for dough to chill - just whip up, pipe out and pop in the oven! After a quick dip in chocolate and a sprinkle of festive decorations, they'll look so fancy nobody will believe you made them yourself.
Why You'll Love These Treats
These cookies couldn't be easier! You only need six basic ingredients plus some chocolate and decorations to finish them off. I'm crazy about how there's zero chilling time - when you get the urge to bake, warm cookies can be yours in just minutes. They're absolutely perfect for last-minute gifts or when you want a fun kitchen project with the kids.
Gather What You'll Need
- Quality Butter: Grab European-style if you can find it for that extra creamy richness.
- Cake Flour: This creates incredibly soft cookies, though all-purpose will work in a pinch.
- Eggs: Cold from the refrigerator is totally fine, they'll warm up during mixing.
- Pure Vanilla: Don't skimp here, the flavor really stands out.
- Sugar and Salt: Simple granulated sugar and a tiny bit of salt for flavor balance.
- Decorations: Pick up some easy-melting chocolate and colorful holiday sprinkles.
Time To Create Magic
- Set Up Your Space
- Start by heating your oven to 375°F, covering baking sheets with parchment, and letting your butter soften. Get your mixer and piping bags ready so everything's at your fingertips.
- Blend Your Base
- Beat the butter, sugar and salt until it looks fluffy and pale, around 3 minutes. This step matters - it's what gives you that heavenly texture! Add your egg and vanilla, mixing just until combined.
- Add The Dry Stuff
- Sift cake flour directly into your butter mixture. Stir gently until everything comes together. You want soft dough that isn't sticky - kind of like modeling clay. Don't overmix or your cookies won't be tender!
- Shape With Style
- Load your piping bag with a star tip - nothing fancy needed, a simple star works great. Squeeze out swirls or whatever shapes you fancy onto your lined sheets. Try to keep them roughly the same size so they'll cook evenly.
- Bake To Perfection
- Slide them into the oven and watch them transform! Around ten minutes usually does the trick - look for slightly golden edges. Let them cool on the pan for a bit before moving them.
- Add The Finishing Touch
- Once completely cool, carefully melt your chocolate. Dip each cookie halfway, give a little tap to smooth it out, then quickly add your festive sprinkles before the chocolate hardens.
Pro Secrets
I've learned a thing or two over the years! Your butter should be just soft enough to leave a fingerprint but not so soft it collapses. A cool kitchen really helps because warm dough gets frustrating fast. If your piping bag feels too warm, stick it in the fridge for a few moments. And here's my little trick: add a tiny dash of salt to your melted chocolate - it brings out amazing flavor!
While dipping, keep a paper towel nearby to wipe excess chocolate from the cookie bottoms - nobody wants chocolate puddles on their plate. Setting up a little production line makes decorating go much smoother and faster.
 Pin it
Your Questions Answered
Not sure about keeping these treats fresh? They'll stay yummy for a week if you store them in an airtight container with wax paper between layers. Want to prep ahead? The undecorated cookies freeze wonderfully for up to three months - just do the chocolate part after thawing. And you can definitely use whatever chocolate you prefer - dark, milk, or white all turn out fantastic!
Brighten Someone's Day
These little treats make such heartfelt presents! I pack mine in colorful holiday tins with tissue paper separating each layer. Tie on a cute ribbon and attach a handwritten note for a gift that'll warm anyone's heart. They're fantastic for cookie swaps, teacher appreciation, or surprising your neighbors. Homemade cookies just speak a special language - they truly say "I care about you" in the most delicious way possible.
Frequently Asked Questions
- → Why should I use cake flour?
It gives the cookies a finer texture and softer bite by keeping the dough less tough.
- → How do I make piping easier?
If it's too thick to pipe, warm with your hands briefly or add a splash of milk. Soft butter works best.
- → Can I freeze these treats?
Absolutely! Keep undecorated cookies in the freezer for up to a month and decorate them after thawing.
- → What makes them a great gift?
They’re sturdy once cooled and easy to wrap up. Just wait till the chocolate sets properly first.
- → Why pick European butter?
It adds richness and creates a nicer crumb thanks to its higher fat content and minimal water.