
 Pin it
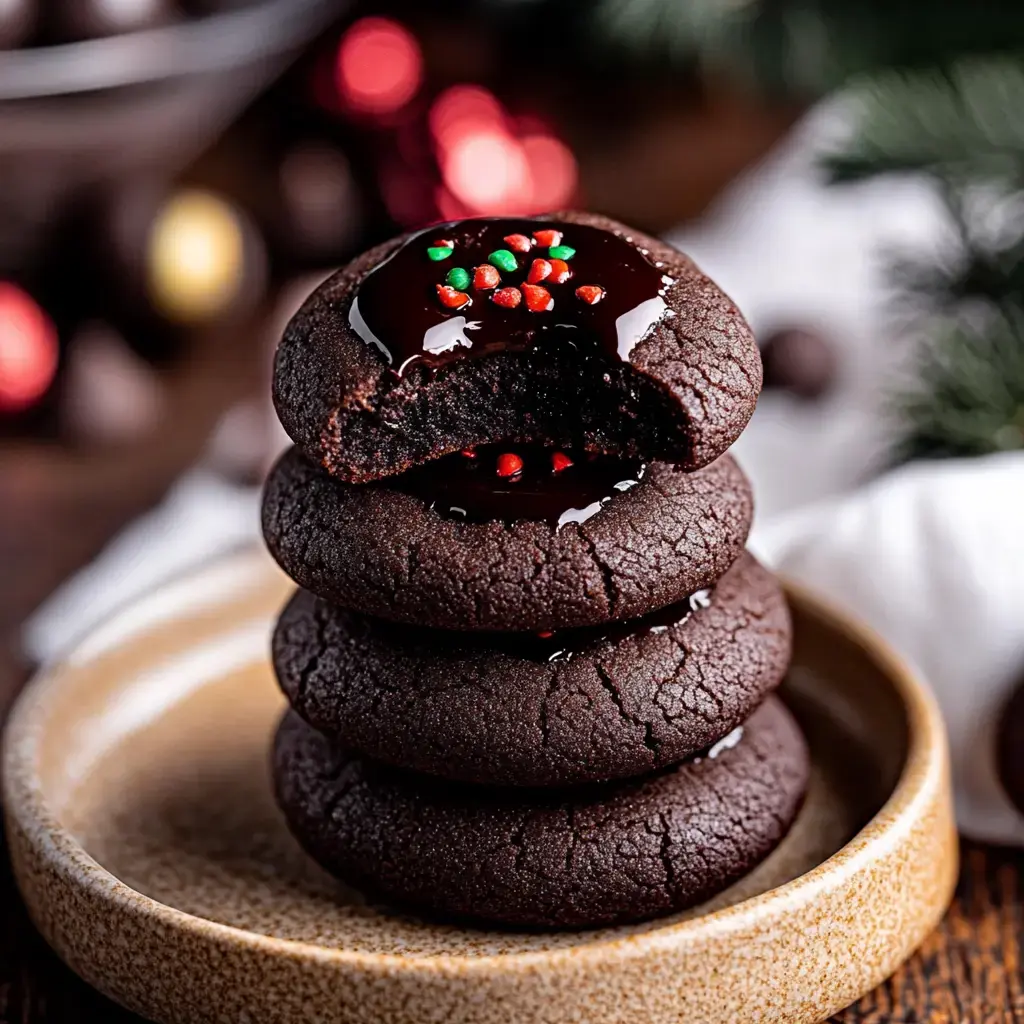
Started baking these super chocolatey thumbprint cookies after snagging awesome cocoa on clearance. First time was chaos—chocolate everywhere, even in my hair! But the rich smell had my whole crew crowding the kitchen. Now it's what we love baking most. My kids crack up making the little thumb wells, though some cookies end up double-dented because they can't help themselves!
Irresistible Cookies You'll Go Back For
- Smells like a chocolate factory in your house
- Super soft, fudgy in the middle for days (if you don’t eat them fast)
- Look impressive but honestly pretty simple
- Kids have a blast pitching in
- Perfect for swaps, gifts, or anytime chocolate fixes
- Loaded with deep chocolate flavor throughout
- Everyone who loves chocolate will beg for them
What You Need
- Baking Ingredients:
- Mix of white and brown sugar uses both for flavor
- Heavy cream for extra creamy filling
- Dark cocoa powder—good kind makes a difference
- Butter—let it hang out on the counter till soft
- Room temp egg yolks, works way smoother
- All-purpose flour—fancy stuff not needed
- Melting chocolate for the centers
- Gear:
- Cookie sheet
- Measuring stuff
- Mixing bowl big enough for easy stirring
- Little saucepan for melting chocolate
Ready for Cookie Fun
- First Things
- Give your butter time on the counter to soften—don’t zap it in the microwave, trust me. While it softens, whisk together the flour and cocoa (no more exploding cocoa dust!)
- Dough Prep
- Cream butter and sugars till it looks pale and fluffy (mixer's fastest but hand-mixing is an arm workout). Chuck in egg yolks one after the other. Toss in flour mix slow or you'll end up dusted head to toe in cocoa.
- Shape 'Em
- Make dough golf ball size—for whatever reason, kids LOVE this bit, and somehow the dough shrinks. Press thumbprints in center, little thumbs make the cutest cookies.
- Bake Away
- Bake 10-12 minutes. The smell gets everyone drooling. Don’t leave them in too long or they dry out—slightly gooey is better than crunchy.
- Chocolate Center
- While cookies cool off, warm cream till just starting to bubble, pour over chocolate, let it sit a couple minutes, then stir smooth. If it’s lumpy, just keep going, it’ll get there.
- Fill and Finish
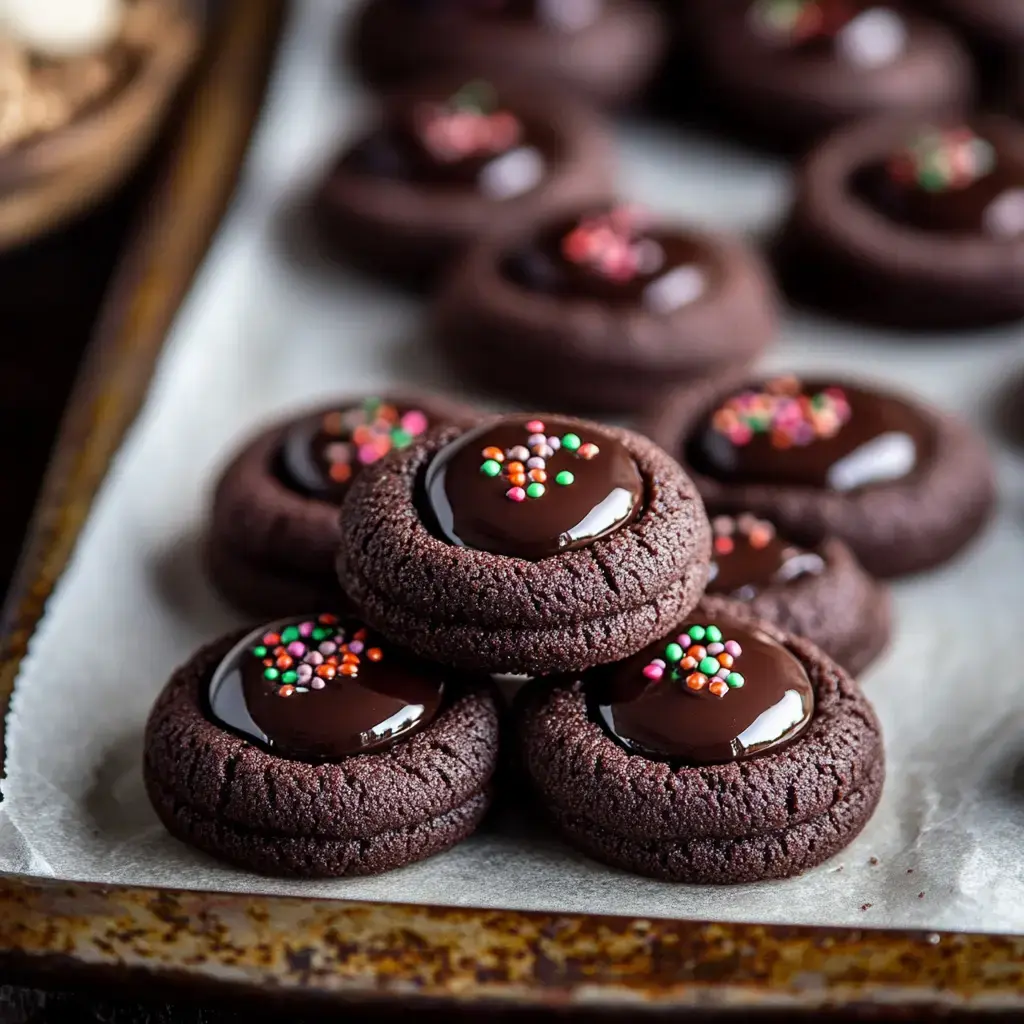
- Spoon chocolate into the thumbprints while you try (and fail) not to eat any yet. Sprinkle if you can beat your kids to the toppings!
 Pin it
What Works Best In My Kitchen
Picked up a bunch of tips making these over and over. Room temp eggs make everything bake up smoother. Seriously, chill that dough first—keeps cookies from oozing everywhere. If the thumb dents rise back up just press ‘em down while cookies are still hot. Hide the cooled cookies if you want any left—my bunch can sniff ’em out anywhere, even way up high!
Change Up Your Filling
I’m all about trying new flavors. Throw in white chocolate for a cool contrast. Peanut butter in the middle? My crew goes wild. Mint extract stirred into the chocolate tastes like swanky dinner mints. Even tried caramel—sticky but not a crumb left!
Storing Your Treats
Put them in a sealed box and they're good for about a week (yeah right, not in this house). Stack with wax paper so they don’t all stick. You can freeze plain cookies for a month or two, just add filling after thawing. Handy for parties or those “gotta have a cookie now” days—pretty much every week around here!
Frequently Asked Questions
- → Why measure flour properly?
Not measuring flour right means your cookies can turn out hard and dry. Avoid dipping the cup straight in; use a spoon and sweep off the extra for better texture, or use a scale for spot-on baking.
- → Why chill the dough?
Chill time keeps cookies thick and keeps those cute thumb shapes from melting away. If you skip it, they're likely to go flat.
- → Why reshape while hot?
Give warm cookies a little fix with a cutter right out of the oven to sharpen the shape and push back any lost dents. They're soft enough to mold before they cool.
- → Can I make ganache ahead?
You sure can, though it'll firm up when it sits. Just heat it gently if it gets too thick to spoon in later. Don’t crank the heat or you’ll split it.
- → Why use Dutch process cocoa?
This cocoa’s smoother and richer for darker cookies. Regular cocoa is okay, but the flavor and look will shift a bit.