
 Pin it
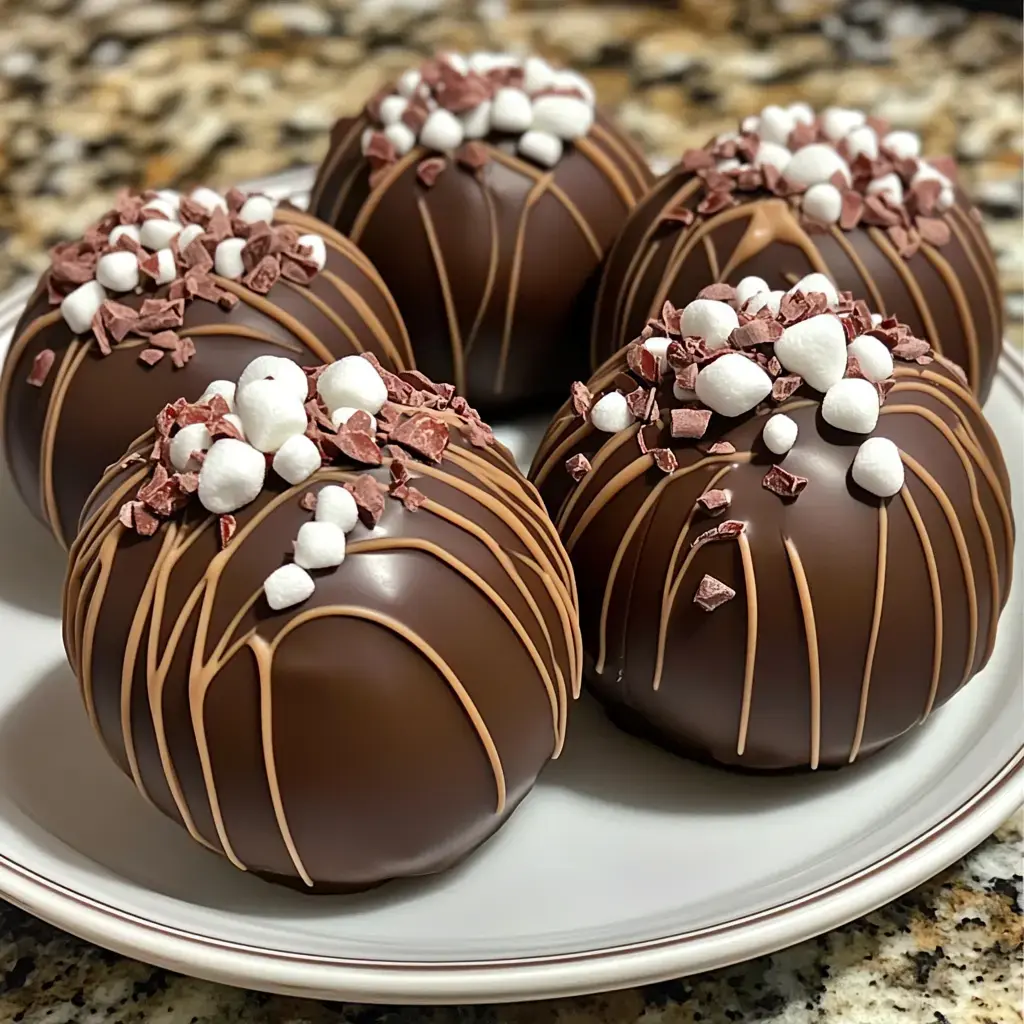
Last winter, my kids spotted those fancy hot chocolate balls at the uptown shop and begged me to make some. Cue lots of chocolatey chaos and happy taste testers until I finally nailed the process! Now, everyone in my circle waits for these beauties as soon as sweater weather kicks in—they've become my go-to homemade holiday treat.
Irresistible Hot Chocolate Bombs
- The Secret Center
- The cocoa mix really pops when you use Dutch-process cocoa. Stir together a little salt, high-grade powdered sugar, and you're golden. Don't skip the salt—it makes a big difference!
- Chocolate Choices
- Don't cheap out! The best results come from chocolate with at least 31% cocoa butter. I’m hooked on Callebaut but Ghirardelli's pretty awesome if that’s what you find. Tried chocolate chips once and it turned into goo—so trust me, go for the good stuff.
- Must-Have Marshmallows
- Fresh, squishy mini mallows seal the deal. Old, dried-up ones from last season won’t melt right—grab a new bag for best results.
Essential Hot Chocolate Prep
- Keep It Cool
- Set your kitchen temp around 70°F if you can. Had a summertime meltdown (literally) before I figured out low temps are magic!
- Prep Like a Pro
- Wipe down every inch of counter space—things will get messy. Line up your gear: silicone sphere molds, a thermometer, whatever brush you trust most. I use a fresh makeup brush for the molds—beats every pastry brush I’ve tried!
Magical Kitchen Moments
- Sculpt the Shells
- Swipe chocolate inside molds with a thin coat, freeze for 5 minutes—no more, or you’ll get sweat drops! Do a second round and focus on thicker edges. Lost plenty to cracking before I figured that trick out.
- Easy Chocolate Melting
- Chop the chocolate till it's basically confetti. Nuke two-thirds in the microwave—zap for 30 seconds, mix, repeat. When smooth, stir in the rest. This way, they're extra shiny every time!
Troubleshooting Time
- Quick Rescue Moves
- Stuck shells? Pop the tray into the freezer for just three minutes. If you spot fingerprints, a warm brush can smooth everything over in seconds.
- Solved Chocolate Issues
- Weird swirls? The culprit’s usually wrong temps. Jot these down: dark chocolate likes 88-91°F, milk wants 86-88°F, and white's happy at 84-86°F. I stick these notes right next to my microwave to keep it simple.
 Pin it
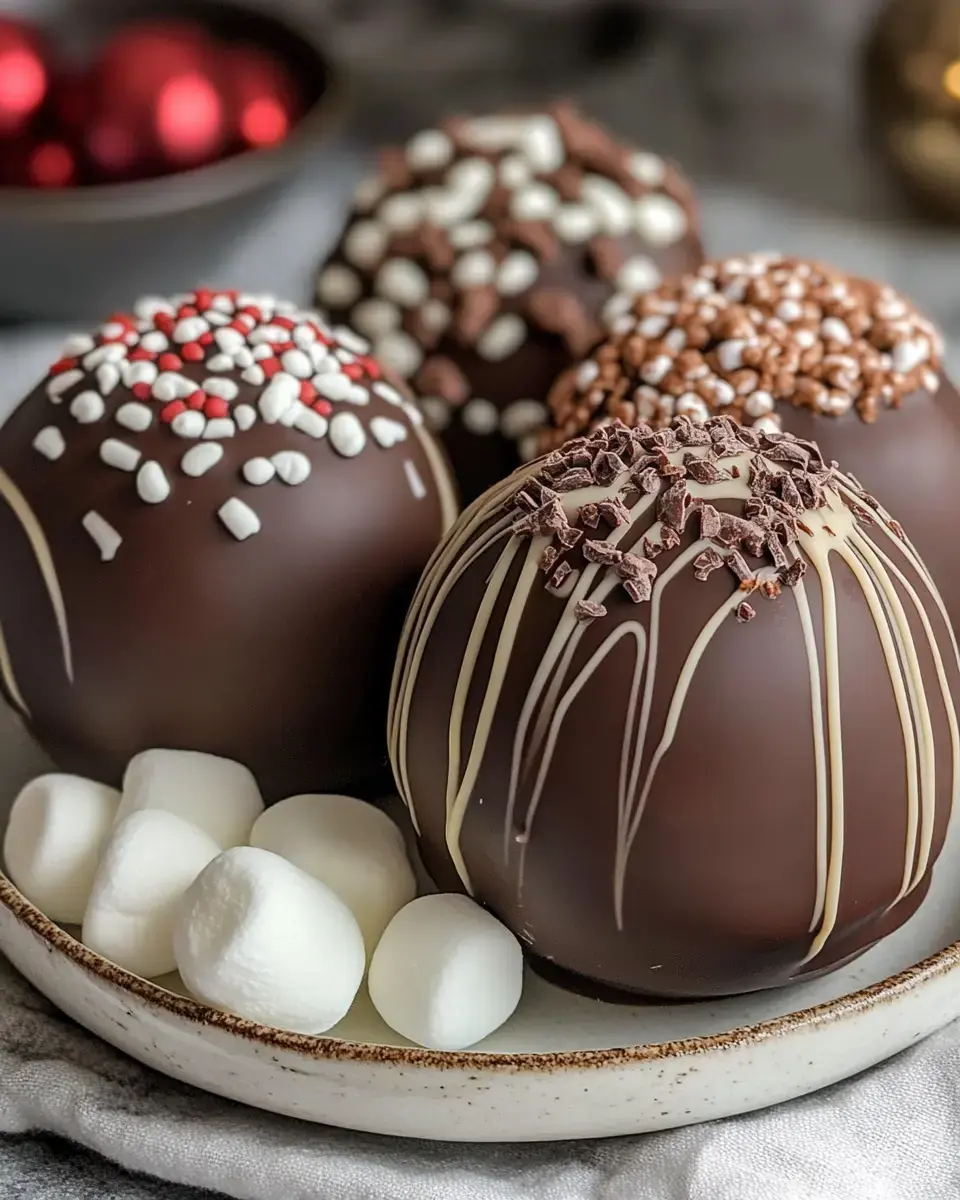
Playful Cocoa Bomb Ideas
- Wild Add-Ins
- After practicing the basics, get creative! My bunch loves galactic-style bombs: swipe colored cocoa butter inside first. For the holidays, I’ll add peppermint oil to the shells or toss in smashed candy canes.
- Finishing Touches
- Toss a little gold powder or shimmer on when they're set for instant wow. Decorating’s way easier if you let them firm up first—trust me on that.
Hot Chocolate Bomb Storage and Gifts
- Best Way to Store
- Skip the fridge—taking them out makes them lose that nice shine! Find a cool spot, around 65-70°F, and stash them airtight. A little silica packet is handy to keep out the damp.
- Packing for Presents
- Treat these like glass! Wrap each one in cellophane, tuck 'em in boxes with some tissue, and add a tag: 'Plop in hot milk (180°F), watch it work its magic, then stir and sip!'
Frequently Asked Questions
- → Got a chocolate kind that works best?
Stick to good-quality bar chocolate or couverture. Those candy melts or chocolate chips? Skip 'em, they just don't temper right and the end result doesn't taste as nice.
- → Is acrylic or silicone better for molds?
Silicone's pretty simple but you might wait longer. Acrylic helps you finish more at once but takes a little practice. Give yourself a little time and both will get the job done.
- → Help! Chocolate won't come out of the mold?
If you used acrylic and it stuck, your chocolate probably didn't set up right. Toss it in the freezer briefly—if you tempered it well, it'll pop free when it's cold.
- → Why check the temp so much?
If it goes above 90°F, say goodbye to that shiny snap. Sticking to the right temp is how you keep the chocolate looking and tasting just right.
- → Spheres look kinda matte, what gives?
That slick shine comes from nailing the tempering steps. Don’t rush or skip them and you’ll get those glossy results every time.
Conclusion
Getting that true pro look means knowing your way around chocolate temps. Just heat, cool, and stir the right way and you'll end up with beautiful, glossy chocolate shells full of cocoa and fluffy bits.