
 Pin it
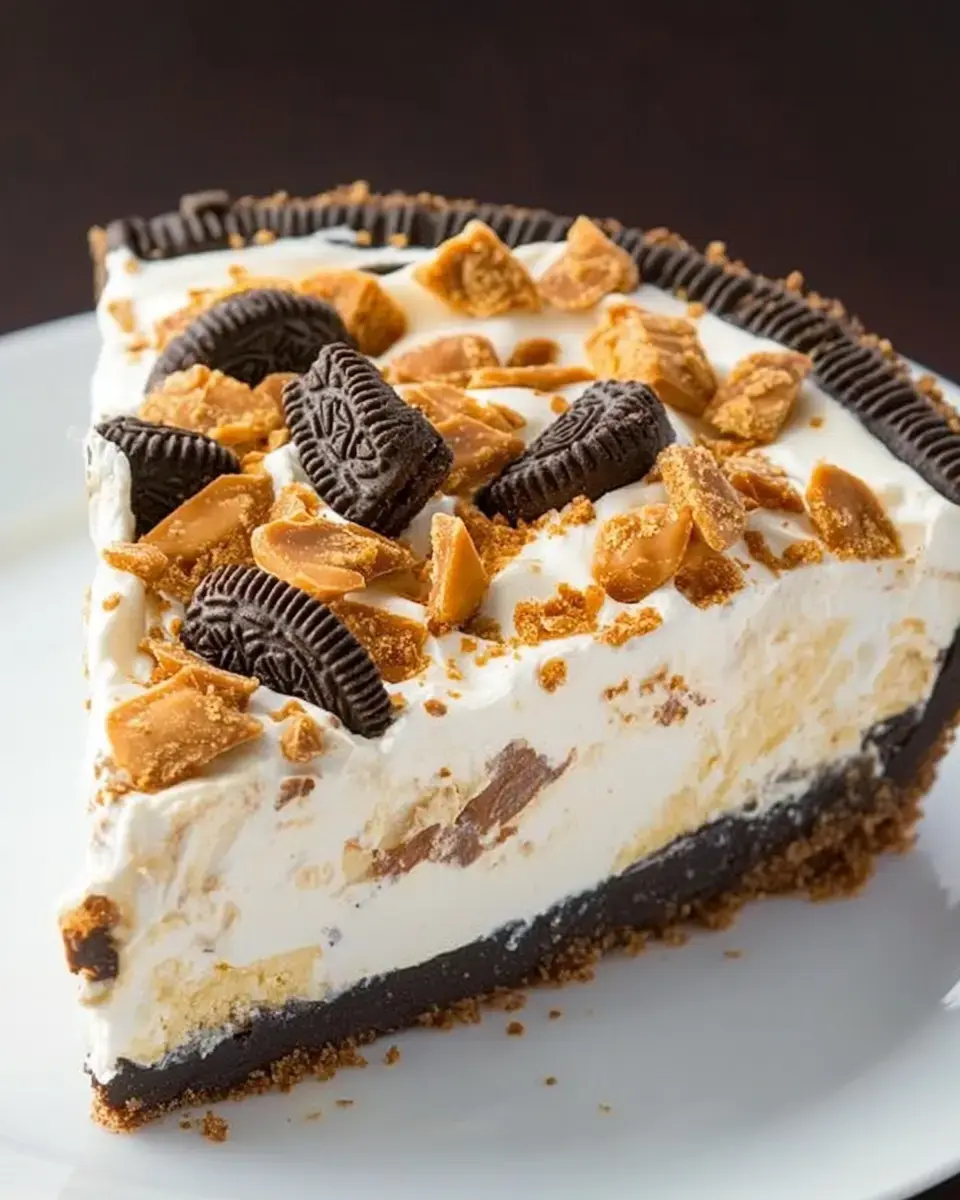
Say hello to your go-to sweet treat: Butterfinger Pie. This simple prep dessert blends the addictive taste of Butterfinger candy with a smooth, velvety filling all tucked into a decadent Oreo cookie base. Great for any get-together, this pie comes together fast and will wow everyone. For parties or just a personal indulgence, this smooth-and-crunchy combo will quickly become a must-have in your dessert lineup.
What Makes This Butterfinger Pie Special
Butterfinger Pie stands out as the dream dessert for anyone crazy about peanut butter and candy. Every mouthful gives you fluffy cream, bits of crunchy Butterfinger, and that thick Oreo base all working together. And since you don't need to bake it, your kitchen stays cool. It's fast, straightforward, and ideal when you want something that looks fancy without much work. You can tweak it how you like, and everyone will ask for seconds.
What You'll Need for Butterfinger Pie
- Oreo Cookies: Ground up finely to make a dark, solid pie base.
- Butter: Melted down to bind the cookie crumbs.
- Heavy Whipping Cream: Beaten until fluffy for an airy, rich texture.
- Vanilla Extract: Brings a gentle sweetness to the whipped topping.
- Powdered Sugar: Makes the whipped layer pleasantly sweet.
- Cold Milk: Blends with vanilla pudding for a creamy center.
- Instant Vanilla Pudding: Forms the base of the silky, rich filling.
- Butterfinger Bits: Provides that nutty crunch throughout. Buy them ready-chopped or smash up whole bars yourself.
Crafting Your Oreo Base
- Get Your Crust Ready
- Turn Oreos into fine dust using your food processor or put them in a plastic bag and smash with a rolling pin. Mix the crumbs with melted butter until everything looks wet. Push this mix into your 9-inch pie dish, making sure it's even and packed down tight. Put it aside for now.
Putting Together The Filling
- Beat Your Cream
- Grab your mixer and whip the heavy cream with vanilla until it stands in stiff peaks. Split this whipped cream in half - you'll use some now and some later.
- Add Some Sweetness
- Mix powdered sugar into half of your whipped cream. This sweet batch will go on top of your pie.
- Mix Up The Pudding
- In another bowl, stir cold milk and vanilla pudding mix until it thickens up nicely. Gently fold in your plain whipped cream until it all looks the same. Toss in most of your Butterfinger pieces, but save some to sprinkle on top.
 Pin it
Putting It All Together and Chilling
- Build Your Pie
- Dump the pudding mixture over your cookie crust and smooth it out flat. Layer or pipe the sweet whipped cream on top of everything. Scatter your leftover Butterfinger bits across the surface.
- Let It Set
- Wrap the whole thing in plastic and stick it in the freezer for 6-12 hours until it's totally firm. This waiting time makes sure you can cut clean slices when it's time to eat.
How To Enjoy Your Butterfinger Pie
When you're ready to dig in, take the pie out and let it sit for about 20-30 minutes so it softens a bit. Cut it into slices and dig in. If you don't finish it all, just cover what's left with plastic or pop it in a sealed container and back in the freezer. It'll stay good for up to a month. This make-ahead sweet is perfect when life gets crazy or for special days, so you've always got something tasty waiting to wow your friends.
Frequently Asked Questions
- → How long will it stay fresh in the freezer?
- You can freeze the dessert for as long as 2 months, but make sure it’s tightly wrapped with both plastic and foil to keep it from freezer burns.
- → Can I switch out Butterfingers for another candy?
- Absolutely! Swap them for candy like Snickers, Reese's, or Heath. Just chop the replacement candy into small bits first.
- → Why should I let it sit out before serving?
- Leaving it at room temperature for 20–30 minutes softens it up a bit, so slicing is easier and the texture gets extra creamy for eating.
- → Is store-bought whipped cream okay?
- Sure, if you’re in a pinch! Homemade whipped cream makes it taste better, but store-bought options work—though the texture may differ slightly.
- → What if I don’t have a deep pie pan?
- Replace it with a springform pan! If there’s too much filling, save the leftovers to snack on separately.