Classic Irish Bread

Featured in: Homemade Bread with Rustic Charm

This soft, rustic Irish bread blends flour, buttermilk, baking soda, and dried fruit. No rising needed. Done in about an hour with a golden look and tender inside.

A woman in a kitchen with a stove and oven.
Updated on Tue, 06 May 2025 17:13:04 GMT
A golden loaf studded with fruit is sliced open on a wooden board. A butter knife and a cup of milk sit nearby. Pin it
A golden loaf studded with fruit is sliced open on a wooden board. A butter knife and a cup of milk sit nearby. | cookingkitchn.com

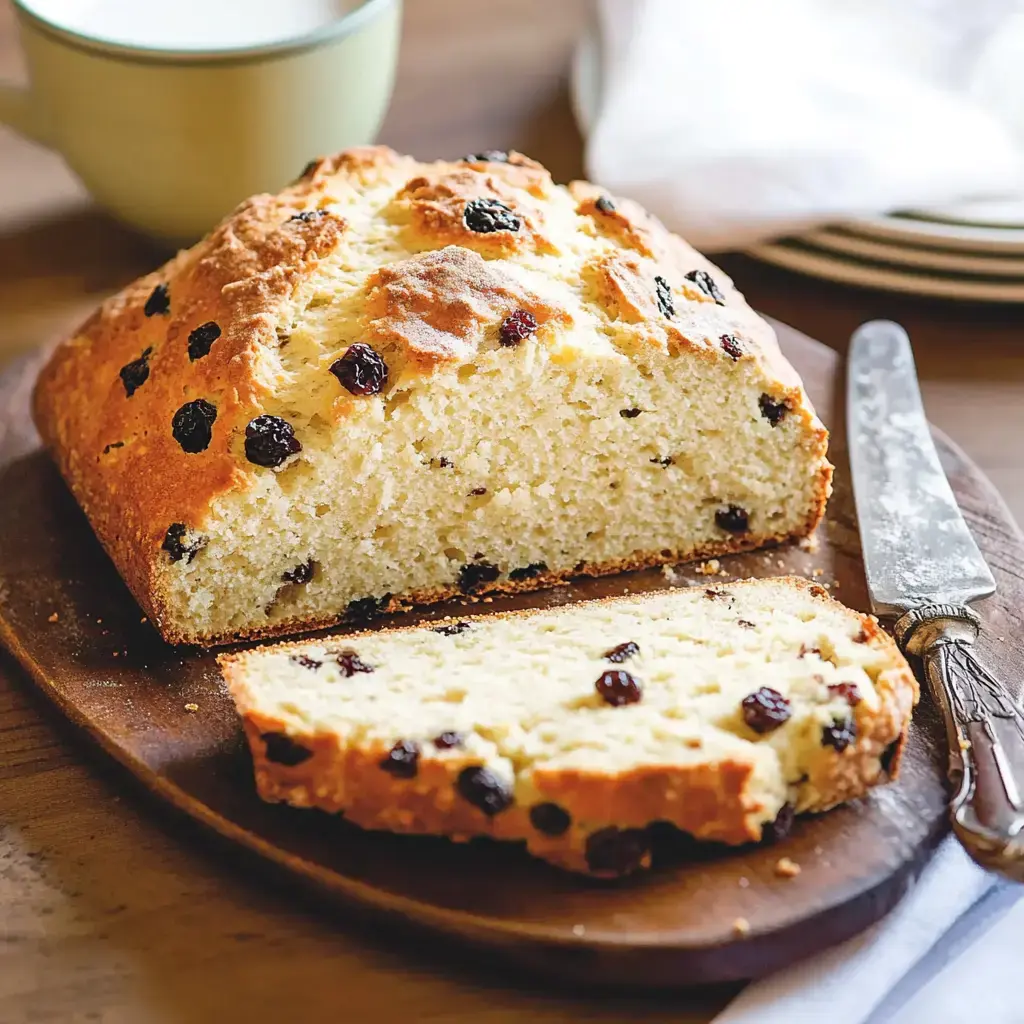
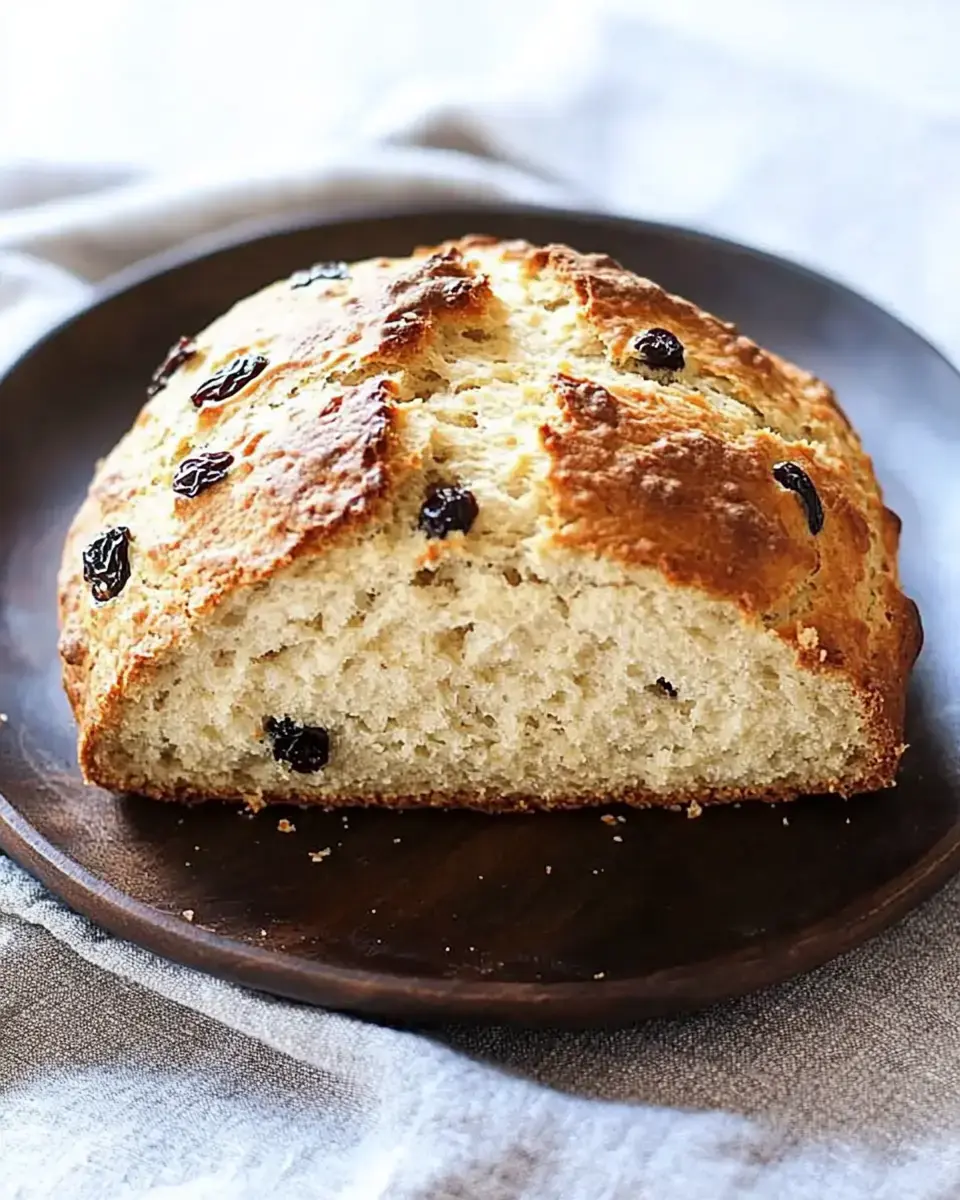
I get so excited making Irish Soda Bread because it's incredibly easy but gives such great results. This bread doesn't need yeast or long rising times - you just mix flour, baking soda, buttermilk and a few extras. My take includes some butter, a bit of sugar, eggs, and juicy raisins for something special. What's awesome? You'll be smelling a fresh-baked loaf in under an hour.

The Purpose Behind That Signature Cut

When I started baking soda bread, I figured the cross cut was just decorative, but it's actually really smart. This deep slash lets heat travel straight to the middle for even baking. It also gives the bread enough space to expand into that beautiful round shape everyone wants.

Must-Have Components

  • Flour: Standard all purpose flour does the job perfectly, nothing fancy needed.
  • Baking Soda: This makes our bread rise when it meets the buttermilk.
  • Salt: A small amount to enhance all the flavors.
  • Buttermilk: This creates that soft texture and slight tangy taste.
  • Butter: Adds a wonderful richness and flavor.
  • Sugar: A small amount for a hint of sweetness.
  • Egg: Binds everything together and makes the bread richer.
  • Raisins or Currants: These add little bursts of sweetness, but you can skip them if you want.

Easy-to-Follow Method

Setup Your Kitchen
Start by warming your oven to 375°F. I prefer my cast iron pan, but a normal baking sheet works fine too - just give it a bit of grease.
Combine Dry Stuff
Stir flour, baking soda, salt and sugar in a bowl, then rub in cold butter until it looks like little crumbs.
Add Liquids
Stir in the buttermilk and egg just enough to form a dough, then gently mix in raisins if you're using them.
Form and Cut
Put your dough on a floured counter, shape into a circle, then cut a deep cross from edge to edge.
Into the Oven
Bake for around 35-45 minutes until it's golden and makes a hollow sound when you tap underneath. Cool slightly before cutting.

Tricks for Perfect Soda Bread

  • Mix Gently: Light handling keeps your bread soft and tasty.
  • Butter Straight from Fridge: Using cold butter creates amazing texture in your finished bread.
  • Listen for Hollow Sound: This never-fail test tells you when your bread is done.
  • Enjoy Right Away: There's nothing better than warm soda bread with melting butter on top.
A freshly baked loaf of bread with raisins sits on a dark wooden plate, showcasing a golden-brown crust and a soft interior. Pin it
A freshly baked loaf of bread with raisins sits on a dark wooden plate, showcasing a golden-brown crust and a soft interior. | cookingkitchn.com

Keeping Your Bread Fresh

Store your soda bread wrapped tightly at room temp and try to finish it within two days. If you want to save it longer, let it cool completely, wrap it well, and freeze for up to two months. When you're ready to eat, just thaw it out and warm it up in the oven.

The Story Behind Soda Bread

I find it fascinating how this bread started as a basic four-ingredient recipe created out of necessity in Ireland. These days we might throw in some extra goodies for richness, but the core idea remains unchanged - quick, simple, and totally delicious. It's comfort food that links us to countless bakers who came before us.

Frequently Asked Questions

→ Why mark the top?

Lets the heat reach inside & gives an iconic look.

→ What causes it to rise?

The buttermilk and soda combo creates a natural lift. Yeast isn’t needed.

→ Can I use a milk alternative?

Fresh buttermilk is ideal, though milk plus lemon juice works fine.

→ Why keep the dough rough?

Mixing too much leads to hard bread. Minimal handling keeps it soft.

→ Why is cast iron suggested?

It makes a crunchier crust, but a regular baking sheet works too.

Classic Irish Bread

A quick, yeast-free Irish bread made with buttermilk and currants. Perfectly golden and ready fast.

Prep Time
15 Minutes
Cook Time
40 Minutes
Total Time
55 Minutes
By: Sophia

Category: Artisan Breads

Difficulty: Intermediate

Cuisine: Irish

Yield: 12 Servings (1)

Dietary: Vegetarian

Ingredients

01 1 teaspoon baking soda.
02 1 tablespoon sugar.
03 4-4 1/2 cups plain flour.
04 1 large egg, whisked.
05 1 teaspoon salt.
06 4 tablespoons softened butter.
07 1 3/4 cups buttermilk.
08 1 cup raisins or currants.

Instructions

Step 01

Heat the oven up fully to 425°F and move rack to the center spot for even cooking.

Step 02

In a big bowl, stir together baking soda, flour, sugar, and salt until they're blended.

Step 03

Use your fingers to rub the butter into the flour mix until it feels like coarse crumbs.

Step 04

Sprinkle in raisins or currants, making sure they spread throughout the mixture.

Step 05

Make a hollow in the middle of your dry ingredients for the wet ones to go into.

Step 06

Pour the buttermilk and beaten egg into the hollow. Mix with a wooden spoon just until it’s no longer easy to stir.

Step 07

With floured hands, gently pull the dough together into a rough ball. Don’t work it too much.

Step 08

If the dough's too sticky, sprinkle in a bit more flour until you can handle it comfortably.

Step 09

On a floured surface, carefully shape the dough into a round loaf, avoiding excess handling.

Step 10

Put the loaf on a greased skillet or baking sheet, ready to bake.

Step 11

Cut a deep X across the top with a serrated knife to help it bake evenly.

Step 12

Pop it in the oven for 35-45 minutes, until the crust is golden and tapping it sounds hollow.

Step 13

Cover it with foil if the top is browning too fast.

Step 14

Stick a skewer or toothpick in the middle—it should come out clean if it’s fully baked.

Step 15

Let it sit in the pan for about 5-10 minutes, then move it to a rack before serving.

Notes

  1. Doesn't need yeast.
  2. Quick and easy to prepare.
  3. A timeless, traditional bake.
  4. Tastes best when still warm.

Tools You'll Need

  • Greased skillet or baking tray.
  • Big mixing bowl.
  • Sharp knife with a serrated edge.
  • A sturdy wooden spoon.

Allergy Information

Please check ingredients for potential allergens and consult a health professional if in doubt.
  • Contains dairy products like butter and buttermilk.
  • Includes eggs.
  • Made with wheat flour.

Nutrition Facts (Per Serving)

It is important to consider this information as approximate and not to use it as definitive health advice.
  • Calories: 263
  • Total Fat: 5 g
  • Total Carbohydrate: 47 g
  • Protein: 7 g