
 Pin it
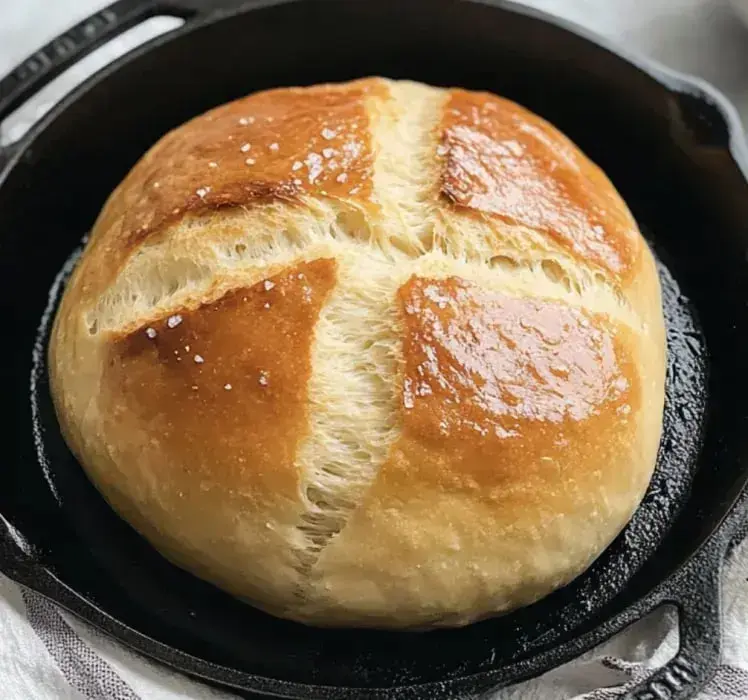
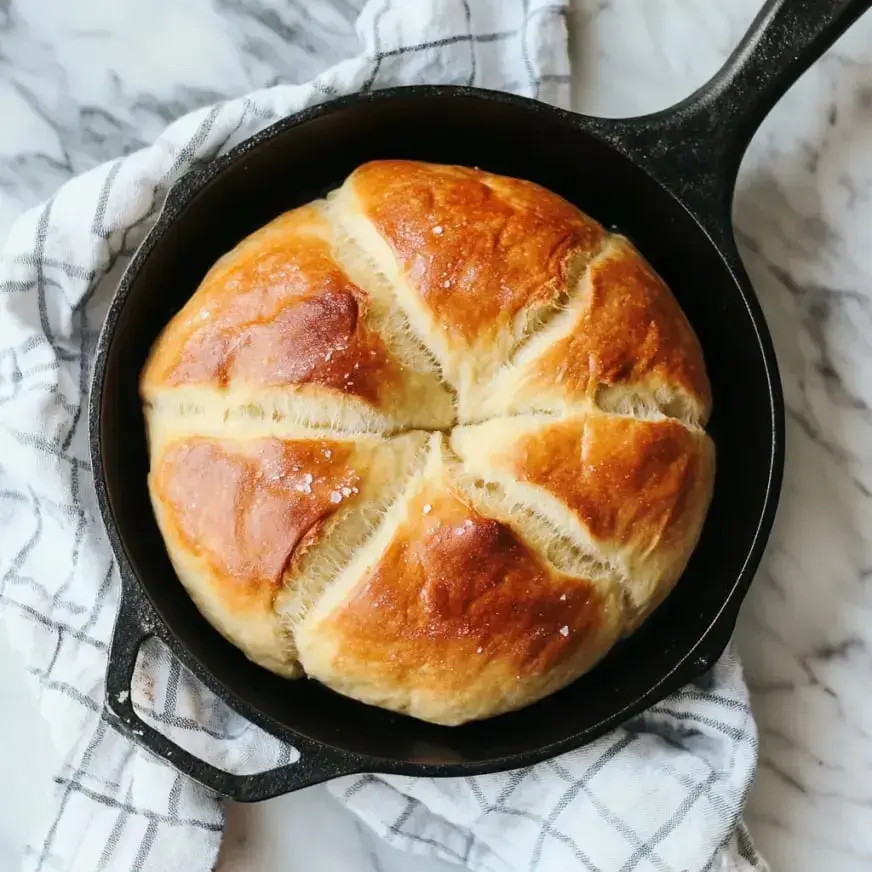
Whip up this simple Skillet Bread with just six kitchen staples. It'll take around 90 minutes from start to finish, though you'll mostly be waiting around. The result? A fluffy, tender bread that goes perfectly with your meal. Even total beginners can nail this recipe!
Benefits of This Homemade Loaf
Never baked bread before? No problem - this one's pretty forgiving. It comes together fast and matches any dinner. Use it to soak up stew, slather with butter, or pair with olive oil and balsamic. Your kitchen will smell amazing while it bakes.
Ingredients List
- Warm Water: Should feel comfortable to touch - nothing scalding
- Honey: Gives a lovely golden color
- Yeast: Double-check it hasn't expired
- Olive Oil: Creates a tender texture
- Bread Flour: Adds that nice chew
- Salt: Just enough to enhance flavor
Preparation Steps
- Activate Yeast:
- Combine warm water, honey and yeast in container. Let sit 10 minutes until foamy.
- Form Dough:
- Add flour, oil and salt. Stir until combined. Throw in extra flour if too tacky.
- Work Dough:
- Stir for 5 minutes until dough becomes elastic.
- Initial Rise:
- Place cover on bowl. Wait 30 minutes until size doubles.
- Form Loaf:
- Create a round shape. Transfer to cast iron pan. Let rest covered another 30 minutes.
- Prep Oven:
- Warm oven to 400°. Score dough surface with knife.
- Cook:
- Bake 12-20 minutes until golden brown. Pay attention during final minutes.
- Last Touch:
- Spread butter over hot surface. Sprinkle salt if desired.
What's So Great About It
A foolproof bread anyone can handle. Uses six basic ingredients. Turns out pillowy inside with a crisp exterior. Bring it to the table in the skillet - it'll look impressive.
Perfecting Your Mix
Start with water and yeast combo - wait for foam. That shows it's alive. Gradually add ingredients, letting your mixer handle the effort. Your dough shouldn't stick to fingers. Go by feel - you'll know when it's right.
Proper Rising Technique
Don't rush the rising process - it's what creates airy, soft bread. Find somewhere cozy in your kitchen. Make sure it's well covered during rest periods. Look for it to puff up twice its size. That second rise really improves texture.
Oven Wisdom
Make slashes across the top so bread can expand. Keep an eye on it while baking - it darkens quickly at the end. It should make a hollow sound when tapped. Adding butter right after baking softens the crust.
Serving and Storage
Cool slightly before slicing into it. Tastes great with butter or dipped in oil and vinegar. Store tightly wrapped for up to three days. Revive stale pieces with a quick toast.
 Pin it
Troubleshooting Guide
Mixture too sticky? Gradually add more flour. Not rising properly? Your spot might be too cool. Turning dark too quickly? Lower the rack in your oven. Want a softer outside? Drape with a kitchen towel as it cools.
Frequently Asked Questions
- → Got plain flour?
Works totally fine, your bread will just be a bit lighter. You can mix different flours too. Newer flour works better. When using whole wheat, you'll need extra water. Give it a quick sift if you notice clumps.
- → Yeast not bubbling?
Make sure water's lukewarm not scalding. Expired yeast won't activate well. Be patient for the full ten minutes. Maybe grab a fresh packet. Store your yeast in the fridge.
- → No fancy mixer?
Your hands do the job perfectly. Stir then push and stretch. It'll take around ten minutes. The dough smooths out gradually. You'll get a nice arm workout too.
- → Heat pan first?
Don't bother - your dough will rise right in it. Just grease the pan well. Let it sit somewhere warm. The pan warms up naturally. Your oven handles the rest.
- → Keeping it fresh?
Cover tightly once cooled down. Stays good for two days on counter. Freezes wonderfully. Stale pieces make great toast. Just cut what you plan to eat.
- → Bread stuck in pan?
Use more oil next time. Slide a knife around the edges. Turn it out quickly while hot. A quality pan makes a difference. Make sure to season your pan properly.
- → Want crispy top?
Splash with water before baking. Steam in the oven really helps. Higher temperature works great. Try putting ice cubes in oven too. Don't cover your pan.
- → Taking it somewhere?
Bundle it up while still warm. Keep it on a flat surface. Use a sturdy container. Maybe slice it when you arrive. Bring some nice butter along.
- → Making big loaf?
Allow extra time for rising. Keep an eye on it while baking. You'll need a larger skillet. Always test the middle for doneness. You might need to cover the top with foil.
- → Top too dark?
Turn down your temperature a bit. Put the pan on a lower rack. Add foil on top. Check it sooner. Try a shorter baking time.
- → Want more flavor?
Toss herbs into the dough. Coat with melted butter. Add some garlic on top. Mix in your favorite cheese. Even different seeds taste great.
- → Dough too sticky?
Sprinkle flour bit by bit. Try working with damp hands. Give it more resting time. Grease your utensils first. Don't go overboard with extra flour.
Conclusion
Enjoyed this? Give flatbread with olives a shot next time. Or try making baguette-style loaves. They use similar ingredients but need different cooking methods.