
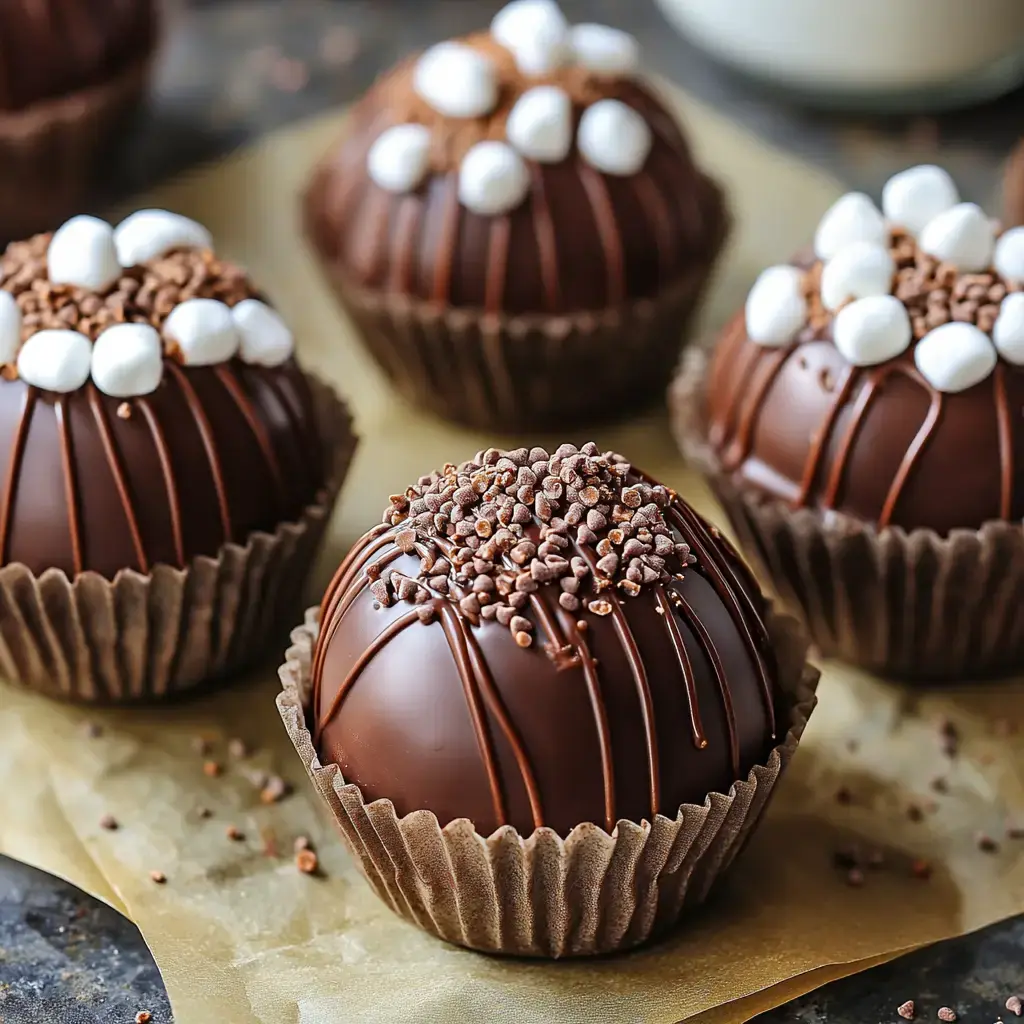
 Pin it
Every winter, I end up turning my place into a chocolate bomb workshop. It started last year after my kids flipped out over some store ones. I thought, 'I can totally top these.' After who-knows-how-many tries and constant chocolatey hands, I finally nailed it. Now, as soon as it gets chilly, neighbors start hinting—they want a box, too.
Unbeatable Success Secrets
I’ve messed these up more times than I want to admit (one time the whole batch turned gooey before I could even wrap them!). The trick? Don’t just grab any chocolate chips from the cupboard. They’ll ruin your setup fast. You really want something legit—real cocoa butter makes a difference. I reach for Callebaut, but Ghirardelli will do in a pinch.
Easy Prep Steps
- What You’ll Need
- Start with about 12 ounces of top-notch chocolate for a half-dozen bombs. Get those silicone sphere molds (they’re cheap online), and use fresh marshmallows, not the stale ones sitting around since last year. Mix up your own cocoa base with Dutch cocoa and a touch of sea salt—it’s worth it.
- Ready Your Space
- Give yourself room to work—it’ll get a little messy until you get the rhythm. Gather your stuff: thermometer, spatula, something soft to spread chocolate (I use a makeup brush that’s only for baking!), and lay out parchment to keep things tidy.
- Keep It Cool
- You’ll want a cool kitchen, right around 70°F. I learned the hard way—if your place is too warm, the chocolate just won’t set nicely. Drop that heat if you need to—so much easier!
Smooth Chocolatey Fun
- Getting Chocolate Ready
- Chop the chocolate until it’s tiny—like confetti. Big chunks are a pain to melt. Slowly heat up two-thirds of it to exactly 100°F, use short blasts in the microwave and keep stirring. Blend in the rest so it turns super smooth and glossy.
- Mold Like a Pro
- Sweep on a light coat of chocolate in the molds. Chill for about five minutes—no longer or you’ll run into issues. After the first set, add another layer, making edges thicker so they hold up when you pop them out. You’ll thank me later.
- Putting It Together
- With the shells ready, fill half with cocoa mix and marshmallows. Warm a pan and gently melt the edges of the empty shell. It takes just a second, then press together for a snug finish.
Trouble Busters
Even if these seem simple, some days things go sideways. If you see cloudy streaks, your chocolate's probably out of the good temperature range—stick with 88-91°F for best results. If the shells don’t come out, put the mold in the freezer for exactly three minutes. Smudges on the outside? A soft touch with a warm brush makes them pretty again. Remember—even the ‘oops’ ones taste awesome!
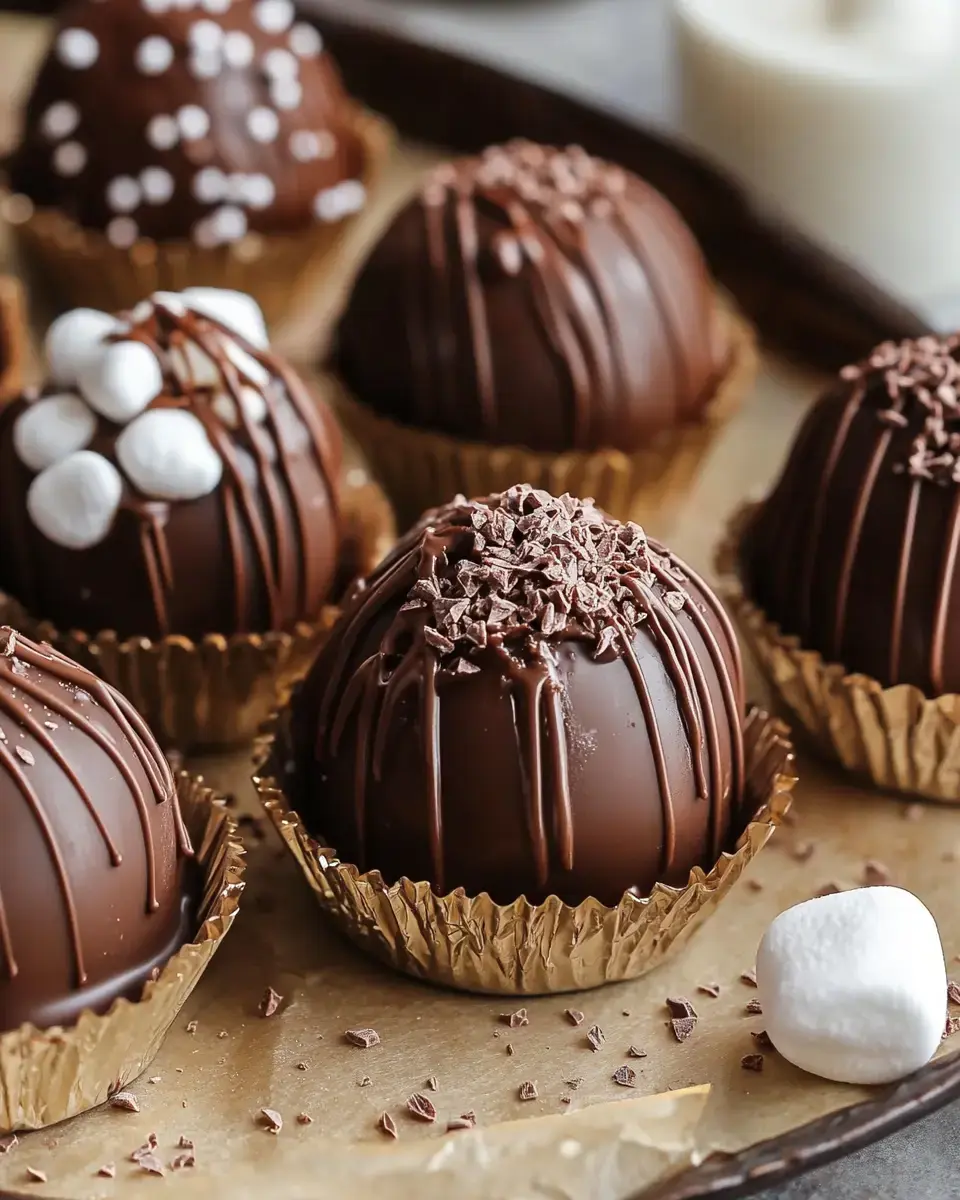 Pin it
Creative Flavor Twists
Once you’re comfortable, switch things up! Try peppermint bits for a holiday kick or toss in some cinnamon and cayenne for a sweet-heat blend. My kids go nuts when we fill them with rainbow sprinkles—they call ‘em unicorn bombs. Or, paint the mold with colored cocoa butter first to get cool swirls.
Easy Ways to Share and Store
Keep your chocolate treats happy in a dry, cool cabinet—not near the stove. They’ll keep for nearly three weeks (if you can wait that long!). To gift, I use see-through cellophane bags and tie everything up with a cute ribbon. Slip in a note: 'Drop one in steaming milk and enjoy the magic.' Warning: once you gift them, you’re stuck making them every year!
Frequently Asked Questions
- → Why doesn't my chocolate harden smooth?
Make sure you keep your chocolate at 88-91°F as you’re working with it. Going above or below that temp makes it lose its shine.
- → No sphere molds handy?
Cupcake wrappers totally work. Brush a few chocolate layers inside them and let each one harden before moving on.
- → Why bother with gloves?
You’ll avoid fingerprints on the chocolate. Gloves keep everything looking super neat.
- → What’s the top milk to use?
Go for whole milk for an extra rich mug, but 2% is fine too. Just warm it up until it’s almost bubbling for the coolest melting show.
- → How should I store them?
Pop them in an airtight box somewhere dry and cool. If your chocolate is tempered, they’ll be delicious for a few weeks.