
 Pin it
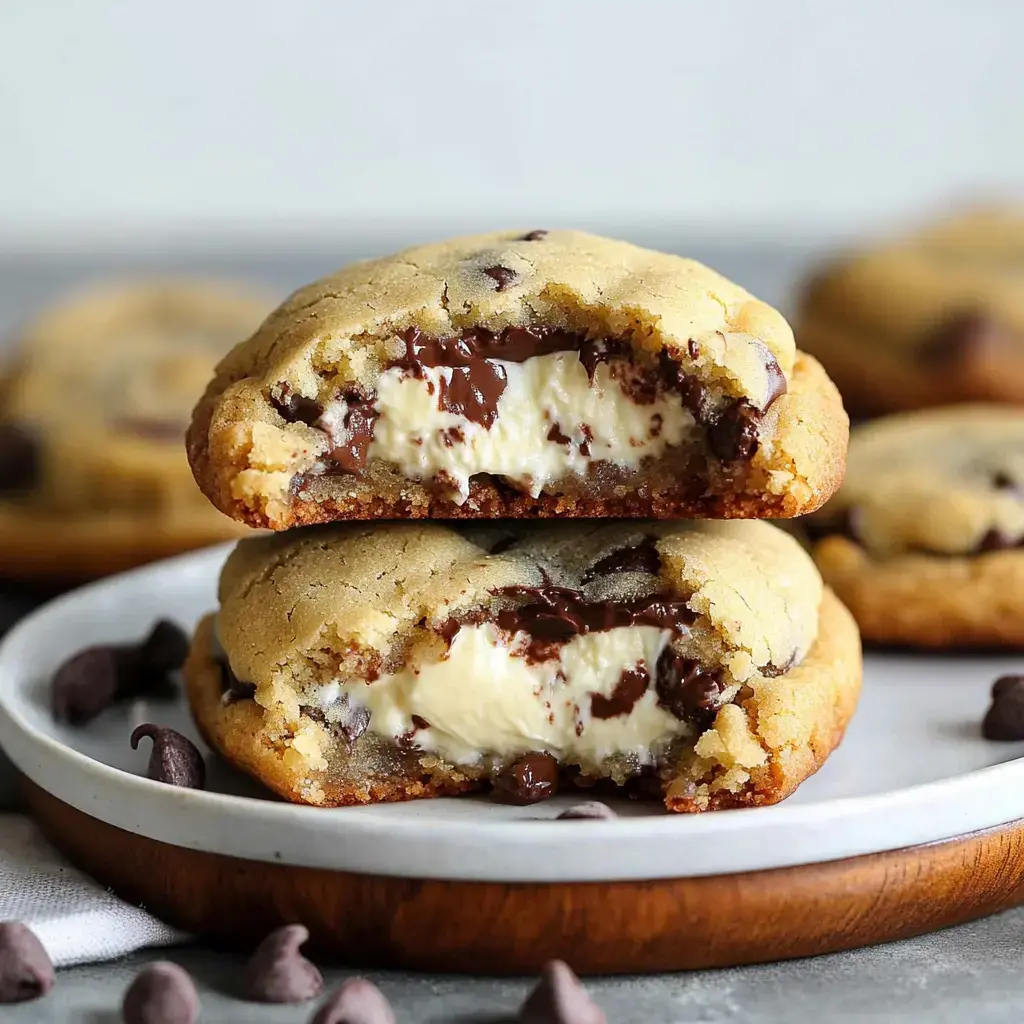
Blend two beloved snacks into one - Chocolate Chip Cookies with Cheesecake Centers! Tuck velvety cheesecake filling inside tender chocolate chip cookies for an extraordinary treat. Perfect for fans of either cookies or cheesecake.
Reasons To Try
Enjoy two fantastic desserts at once. Tender cookie exterior with smooth cheese center makes these stand out from typical cookies. They're show-stoppers at gatherings - everyone will beg for your secret. They give you that wonderful cheesecake flavor without all the fuss of making a whole one.
Ingredients List
- Cream Cheese: Chilled but pliable
- Powdered Sugar: Creates creamy filling
- Butter: Softened to room temperature
- White Sugar: Standard granulated type
- Brown Sugar: Adds moisture and chewiness
- Egg: One complete
- Yolk: Extra for texture
- Vanilla: Preferably natural extract
- Salt: Small amount
- Baking Soda: For proper rising
- Flour: All-purpose white
- Chocolate Chips: Semi-sweet works best
Preparation Steps
- Preheat Oven:
- Set to 375°. Line your baking tray with parchment.
- Create Filling:
- Combine cream cheese with powdered sugar until creamy. Chill to maintain firmness.
- Begin Cookie Base:
- Cream butter with both sugars for 2 minutes until light.
- Mix Liquids:
- Add egg, the extra yolk, vanilla, salt, and baking soda. Blend for 1 minute until combined.
- Complete Dough:
- Gradually add flour. Fold in chocolate pieces. Avoid overworking.
- Form Cookies:
- Take dough portions, flatten, add cheese mixture in center. Fold dough over filling, making sure edges stick together.
- Cook:
- Arrange cookies on tray with room between. Bake around 9 minutes until golden at edges.
- Rest:
- Leave on tray 2-3 minutes. Transfer to cooling rack until completely cooled.
What Makes Them Special
Can't decide between cheesecake or cookies? Now you don't need to choose. Every mouthful gives you soft cookie exterior and creamy cheese inside. They're ideal when you want something impressive that still feels like comfort food.
Ingredient Tips
Your cream cheese should stay cool for the best filling texture. Always go with actual butter, not substitutes. The combination of sugars creates the perfect cookie texture. That second yolk really adds chewiness. Natural vanilla brings much better flavor than artificial. Quality chocolate chunks make a noticeable difference.
Success Strategies
They're simple to whip up if you stick to the instructions. Keep your filling chilled while working on the dough. Try using a consistent scoop size for uniform cookies. Wrap the dough completely around filling to prevent leaks. If they come out misshapen, you can gently nudge the edges with a spoon to round them out.
Professional Appearance
Stick a few extra chips on top right after baking. This makes them look amazing and boosts chocolate flavor. Fix their shape immediately when they're fresh from the oven - you can't do it once they've cooled. Let them set up enough before moving or they'll fall apart.
Storage Advice
Store them in your fridge because of the cream cheese component. They'll probably vanish quickly anyway - they're too tasty! Want to enjoy them warm? Pop in the microwave for a few moments. When storing, put paper between layers so they won't stick together.
Handy Hints
Get your butter soft but keep that cream cheese cool. Don't overwork your dough or you'll end up with tough cookies. Make sure those edges are well sealed to keep filling inside. Watch them closely while baking - better underdone than burnt. Wait before taking a bite or that hot filling might burn your mouth.
Frequently Asked Questions
- → Where to keep em?
Store them in an airtight container. Pop them in the fridge. They'll stay good for about five days. Don't store at room temp. Cold storage works better.
- → Need em without wheat?
Gluten-free flour blends work well. Follow package instructions. Try a small amount first. Cooking time might increase. Taste remains great.
- → How long they last?
Maximum five days refrigerated. If anyone leaves you any! Wrap them tightly. They taste best day one though. Freeze for longer storage.
- → Want to save dough?
Store shaped balls in freezer. Bake from frozen state. Add a few extra minutes baking. No need to defrost. Results are excellent.
- → No stand mixer?
Electric hand mixer does fine. Manual mixing works too. It'll take extra effort. Your muscles will feel it! End result isn't affected.
- → Getting too flat?
Refrigerate dough more. Form larger cookie balls. Check your oven temperature. Use cold butter. Leave proper spacing between.
- → Centers leaking?
Close edges completely. Keep filling refrigerated. Don't overfill cookies. Press dough firmly closed. Monitor during baking time.
- → Taking em places?
Transport them chilled. Pack carefully in layers. Use parchment between rows. Bring some extras. Serve them promptly.
- → Need em faster?
Use premade dough. Try store-bought filling. Create smaller cookies. Watch baking time carefully. They'll still be tasty.
- → Want different taste?
Swap chip varieties. Add cinnamon or vanilla. Consider adding chopped nuts. Try alternative fillings. Fresh berries work nicely.
- → Look too plain?
Coat in granulated sugar. Add colorful toppings. Add melted chocolate after baking. Keep sizes uniform. Press extra chips on top.
- → Dough too sticky?
Cool it in refrigerator. Dust hands with flour. Minimize handling time. Keep everything cool. Work at a brisk pace.
Conclusion
Enjoyed these? Next time try cheesecake swirled brownies. Or maybe whip up some red velvet cookie cups with frosting. They both feature that wonderful surprise inside.