
 Pin it
Want mouthwatering prime rib at home? This foolproof method delivers exceptional results every time. We'll guide you through creating tender, juicy meat with a delicious herb crust. Our straightforward instructions take the mystery out of preparing this classic centerpiece, helping you serve up restaurant-quality beef without leaving your kitchen.
Tasty Rib Roast Benefits
Cooking a rib roast at home isn't as tough as you might think. Our easy breakdown gives you all the info for perfect doneness. The approach works great for both bone-in and boneless options. You'll save tons of cash compared to steakhouse prices, and create lasting memories around your table with family and friends enjoying this impressive cut together.
Ingredients For Success
- Horseradish: A zesty optional addition that complements the meat wonderfully
- Olive Oil: Creates a base for your seasoning to stick properly
- Garlic: Adds depth and savory notes to the finished dish
- Fresh Thyme: Brings subtle earthy flavor to the crust
- Fresh Rosemary: Provides aromatic pine-like fragrance
- Fresh Black Pepper: Adds necessary spiciness and character
- Sea Salt: Brings out natural flavors of the beef
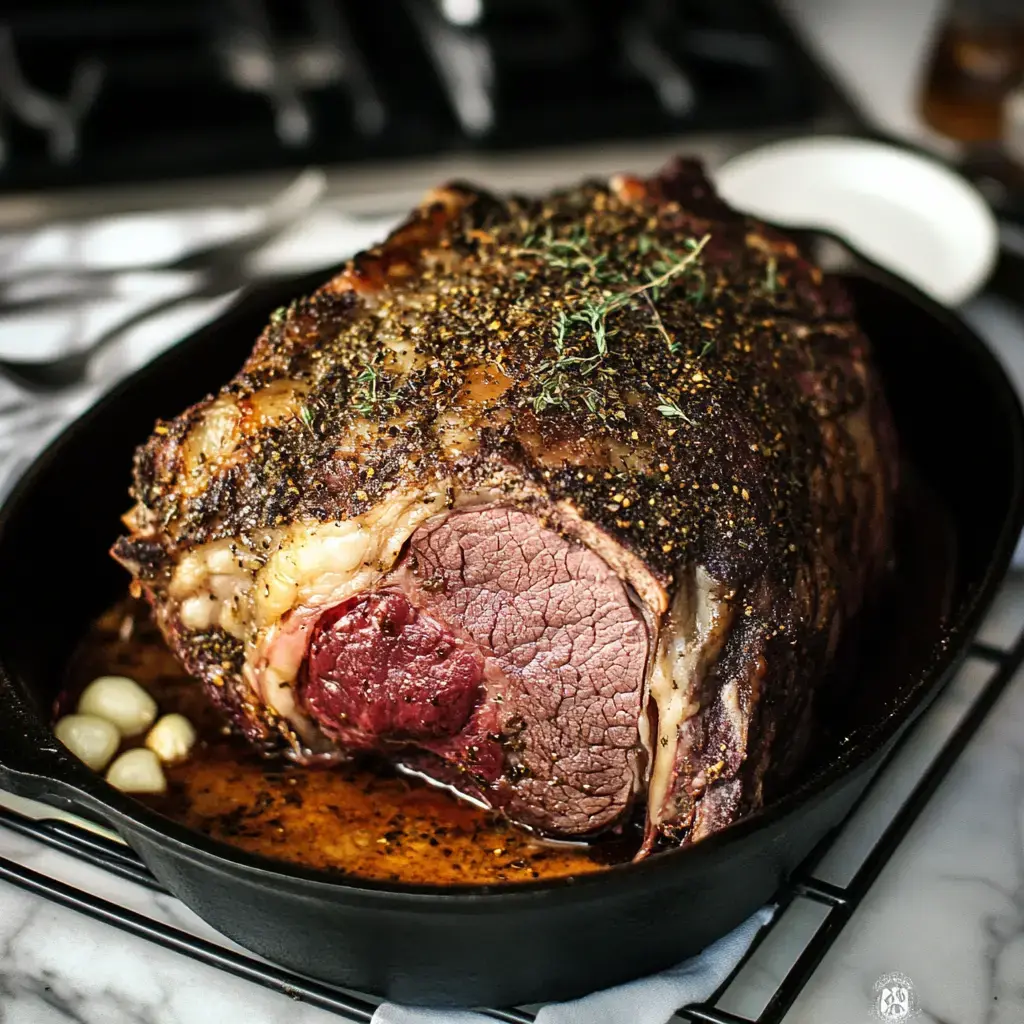
- Prime Rib: Choose bone-in cuts for maximum flavor impact
Cooking Method Breakdown
- Slice Your Creation:
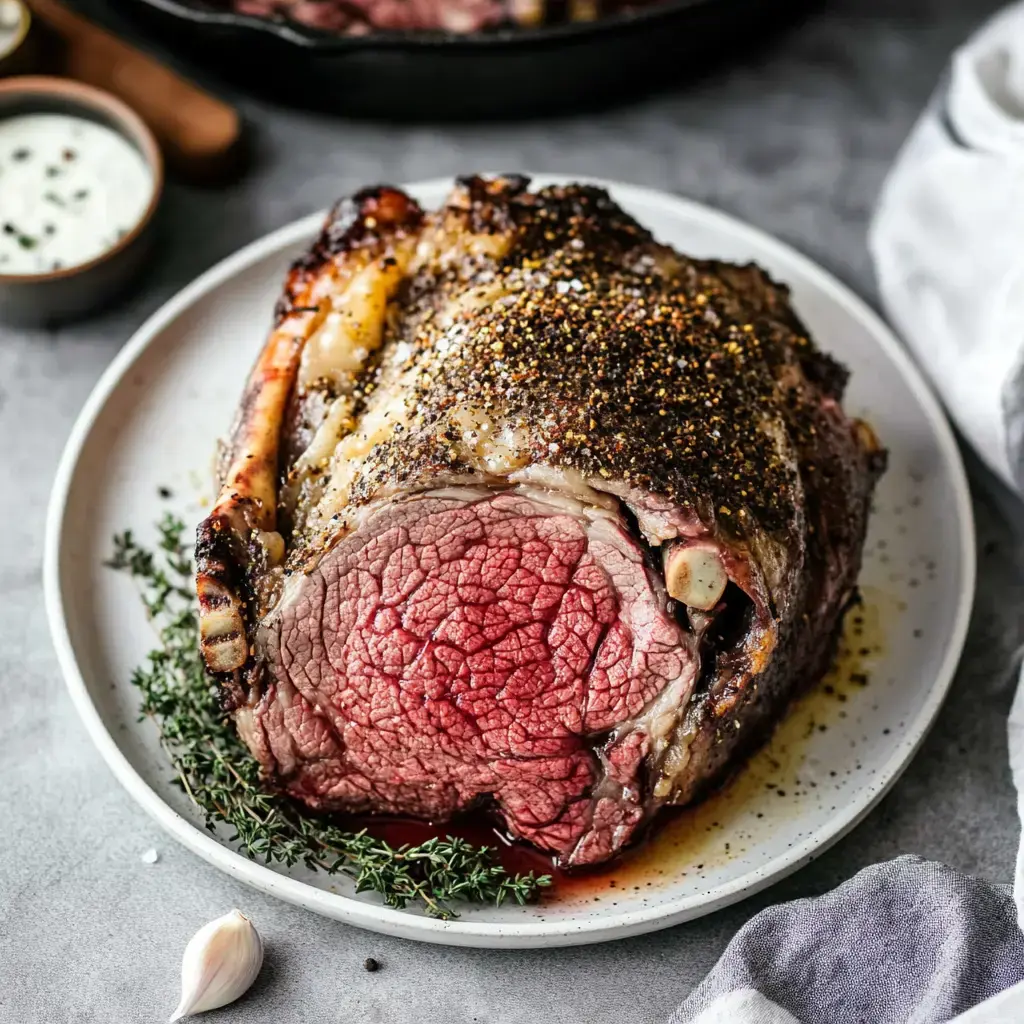
- Cut across the grain after cooking for the most tender bites of your beautiful roast.
- Let It Sit:
- Don't rush to cut - proper resting keeps all those tasty juices inside the meat.
- Slow And Steady:
- Turn heat down to 325°F after the initial blast for gentle cooking throughout.
- Crust Formation:
- Start with 15 minutes of intense 500°F heat to develop that amazing outer texture.
- Position Properly:
- Place your meat correctly in the roasting pan so heat circulates evenly around it.
- Add Flavors:
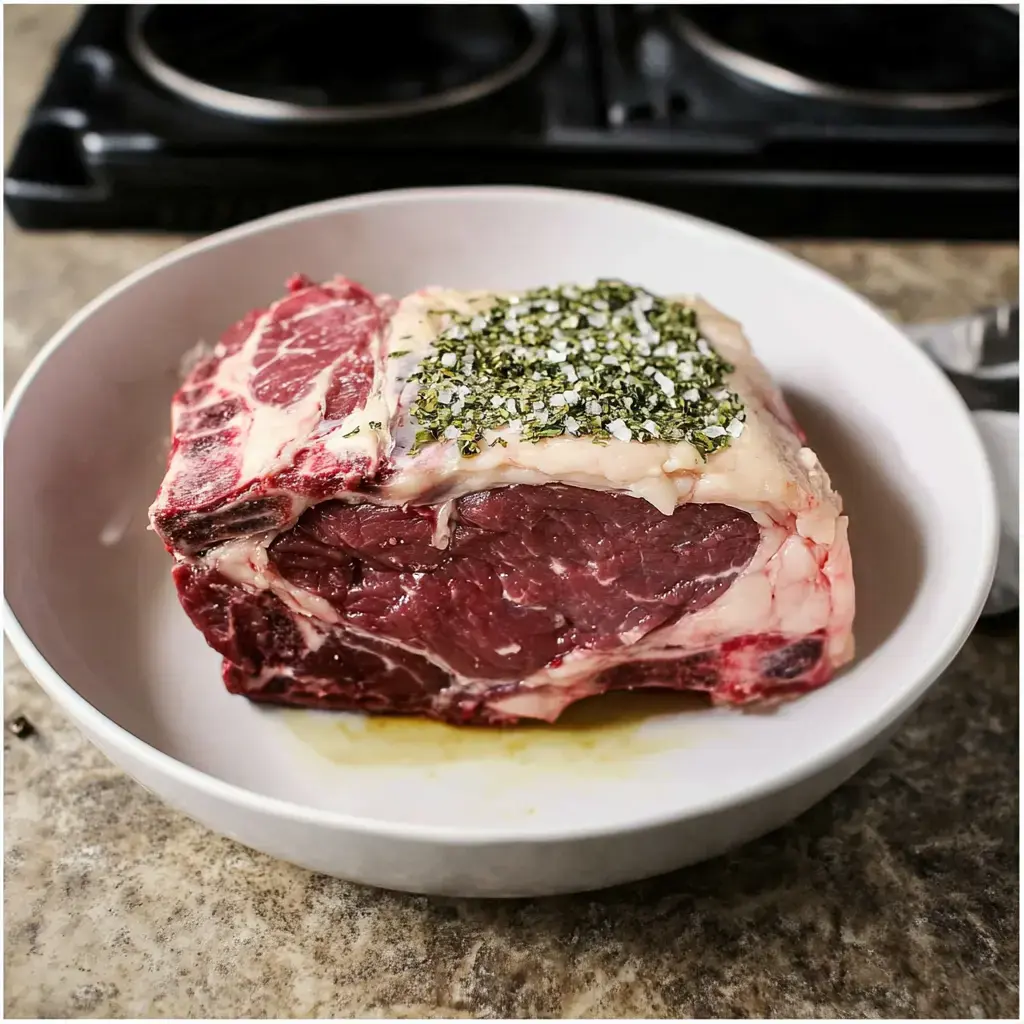
- Good seasoning makes all the difference - thoroughly combine your herbs and spices before applying.
- Warm Up Your Oven:
- Begin at 500°F for that ideal first stage of cooking.
- Temperature Matters:
- Always bring meat to room temperature first so it cooks evenly from outside to center.
 Pin it
Selecting Your Cut
Finding the right piece of meat matters when preparing a roast. This method works well with or without bones, though keeping them in during cooking adds extra flavor. Many pros cook with bones attached for taste then remove them before serving for easier carving. Talk to your meat counter person about this approach when shopping for your next special meal.
Timing For Perfect Doneness
Getting the timing right makes all the difference for a juicy outcome. Always start hot, then switch to gentle heat for the main cooking phase. For medium-rare results, plan on roughly 13-14 minutes per pound at 325°F. Don't trust time alone - a good meat thermometer is your best friend for nailing the exact doneness you want.
Flavor Boosting Tips
Amazing taste starts with proper seasoning. The herb mixture in this approach creates an incredible flavor-packed crust. Our special combo of garlic and fresh herbs transforms an ordinary cut into something memorable. For best results, give the seasonings plenty of time to penetrate the meat before you start cooking.
 Pin it
Why Resting Makes A Difference
Don't skip letting your meat rest after cooking. This might seem unimportant, but it's actually crucial for a tender result. Allow at least 30 minutes covered loosely with foil before slicing. This waiting period lets all those flavorful juices redistribute throughout the meat instead of running out when you cut too soon.
Presentation Pointers
Cutting your roast correctly finishes your cooking journey. This impressive meal deserves thoughtful presentation. Plan complementary sides like creamy potatoes and warm bread to round out your spread. Whether you're cooking for a holiday gathering or just making Sunday dinner extra special, how you plate and serve the finished product puts the final touch on your efforts.
Frequently Asked Questions
- → How long to rest meat?
At least 30 minutes. This keeps moisture inside. Wait before cutting. Cover loosely with aluminum foil. You'll thank yourself later.
- → Fresh or dry herbs?
Fresh ones deliver better flavor. Dry herbs can work too. You can combine them if needed. Just remember to use dry herbs sparingly. Quality matters with fresh ones.
- → Need bones in meat?
Either option works well. Bones boost the taste. Bone-in takes more time. Always check temperature. Request butcher to tie it up.
- → Want pink middle?
Cook until internal temp hits 130. Resting will increase temperature slightly. Use thermometer for accuracy. Pink means juicy. Never exceed 140 degrees.
- → Need spicy sauce?
Creamy horseradish works great. Some folks prefer mustard. Prepare sauce beforehand. Serve it cold alongside hot beef. Even plain tastes wonderful.
- → Getting too brown?
Drape with aluminum foil. Turn down temperature slightly. Reposition pan lower in oven. Monitor more frequently. Cooking time might be shorter.
- → Taking it places?
Transport meat whole and wrapped. Slice on location if possible. Bring a good knife. Transport sauce refrigerated. Consider backup side dishes.
- → Need it quick?
Choose smaller roast for speed. Room temperature start helps. Begin with high heat briefly. Monitor temperature constantly. Still can't skip proper resting.
- → Making big one?
Invest in quality thermometer. Cooking takes longer. Check temperature constantly. Rotate pan occasionally. Watch for edges cooking faster.
- → Want more flavor?
Add extra garlic. Switch up herb varieties. Apply rub the night before. Let it marinate with salt. Wine basting adds richness.
- → Meat not tender?
Room temperature start is crucial. Avoid excessive heat. Probe correct area. Allow adequate resting time. Consider upgrading meat quality.
- → Too much or little?
Plan one rib for two people. Enjoy cold leftovers. Slice and freeze extra portions. Stays good refrigerated for days. Makes tasty sandwiches too.
Conclusion
Enjoyed this? Give herbed lamb a shot. Or try preparing beef tenderloin instead. Both are wonderful for dinner parties.