
 Pin it
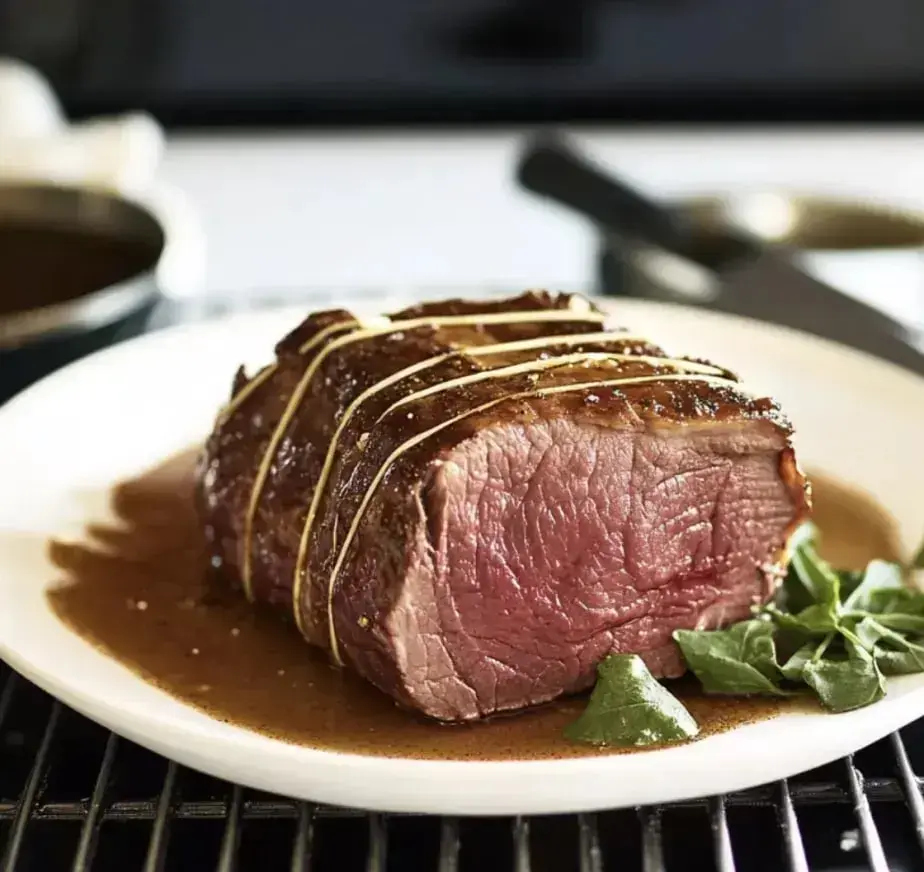
Looking to whip up a top-notch beef roast? This beloved meal adds warmth to any dinner table. It's great for family gatherings or making extra for tasty sandwiches later on. Our straightforward approach gives you juicy, tasty meat every single time.
Totally Worth It
A solid beef roast turns ordinary meat into something memorable. With basic items and plenty of patience, you'll end up with food that's both fancy-looking and wallet-friendly. It's just right for weekend family meals or special celebrations.
Shopping List
- Wine or Stock: Creates delicious gravy
- Cornstarch: For sauce thickening
- Beef Roast: Grab a good 3-pound piece
- Olive Oil: For better browning
- Garlic: Several fresh cloves
- Salt: Enhances natural flavors
- Pepper: Freshly ground is ideal
Easy Instructions
- Time to Eat:
- Cut against the grain in thin slices. It'll make tonight's dinner amazing and tomorrow's sandwiches even better!
- Make The Gravy:
- While you're waiting, turn those drippings into sauce. Pour in some liquid, mix cornstarch with water and stir it in, then cook until thickened.
- Let It Rest:
- Pull it out and wrap with foil. Wait at least 15 minutes - this step keeps all that juice locked inside the meat.
- Watch Temperature:
- Keep cooking until the inside hits 135°F for medium-rare. This typically needs about 1½ to 2½ hours, based on size. Don't guess - use a meat thermometer.
- Start Cooking:
- Set your beef fat-side up on the middle rack. Put a pan underneath to catch those flavorful drips. Begin hot for browning, then turn down the heat for slow cooking.
- Season Well:
- Coat the entire roast with oil, then sprinkle plenty of salt and pepper all over. Don't hold back - proper seasoning makes all the difference.
- Add Flavor:
- Cut tiny slits in the meat and push bits of garlic inside. These flavor spots melt into the beef while cooking, making each mouthful taste fantastic.
- Heat Up:
- Warm your oven to 375°F. You'll want two racks - one for the meat and another for collecting drips. This setup makes awesome gravy later.
- Get Ready:
- Pull your beef out ahead of time. Let it sit at room temperature for 1-2 hours. This helps it cook more evenly. Add some salt and wrap it loosely.
Choosing Your Meat
Your beef roast success starts with picking the right cut. Whether you go fancy with prime rib or stay budget-conscious, look for fat streaks throughout. That's what keeps your roast moist during cooking.
Take Your Time
The key to soft, tender beef is not rushing things. Begin hot to get that outside brown, then drop the temperature and be patient. This gentle method turns even cheaper cuts into mouthwatering meals.
Simple Seasonings
Basic flavors work wonders on a beef roast. Just salt, pepper, and garlic let the beef's real taste come through. A thin layer of oil helps everything stick and builds a tasty outer crust.
 Pin it
Cooking Clock
For spot-on beef, count roughly 30 minutes per pound at lower temps. Keep that meat thermometer close by - it's your most important tool for getting the perfect doneness.
Next-Day Meals
Don't toss the extras! Thinly cut beef makes incredible sandwiches. Wrap it well and pop it in the fridge for quick meals throughout the week. Nothing beats grabbing a cold beef sandwich when you're hungry at lunchtime.
Frequently Asked Questions
- → How keep meat juicy?
Let it come to room temp first. Take your time cooking. Give it proper rest after. Save all pan drippings. Totally worth waiting for.
- → Need different meat cut?
Several large cuts can work. Adjust cooking times accordingly. Monitor internal temperature carefully. Fat marbling adds flavor. Consult your butcher.
- → No wine for sauce?
Beef stock works perfectly fine. Plain water helps too. Even bouillon cubes work. You need something with depth. Your gravy will still taste amazing.
- → Want to make ahead?
Cooking a day early works well. Reheat slowly next day. Prepare fresh gravy when serving. Wait to slice until ready. Store tightly wrapped.
- → What goes with it?
Roasted vegetables complement nicely. Fluffy mashed potatoes are ideal. A crisp green salad. Warm crusty bread too. Simple sides work best.
- → Getting too brown?
Tent with aluminum foil. Turn oven temperature down. Reposition rack lower. Check more frequently. Monitor closely.
- → Taking it places?
Transporting hot is challenging. Better to cook on location. Bring prepped ingredients. Preheat oven early. The effort pays off.
- → Need it faster?
Good roasts can't be hurried. Plan your timing well. Room temperature meat helps. Calculate needed time. Patience brings rewards.
- → Making big one?
Allow extra cooking time. Watch for doneness in center. Consider foil protection. Check temperature regularly. Patience is key.
- → Want more flavor?
Add extra herbs generously. Use plenty of fresh garlic. Season every surface well. Try adding wine too. Don't overwhelm the natural beef taste.
- → Gravy too thin?
Reduce it longer. Add a flour-water mixture. Stir constantly while boiling. Add salt and pepper. Retain some browned bits.
- → Meat too done?
Remove it earlier next time. Let it rest more. Monitor temperature regularly. Trust your thermometer. Slightly undercooked is better.
Conclusion
Enjoyed this? Next time try herb-rubbed chicken. Or go for fancy beef wellington. Both work great for family gatherings.