
 Pin it
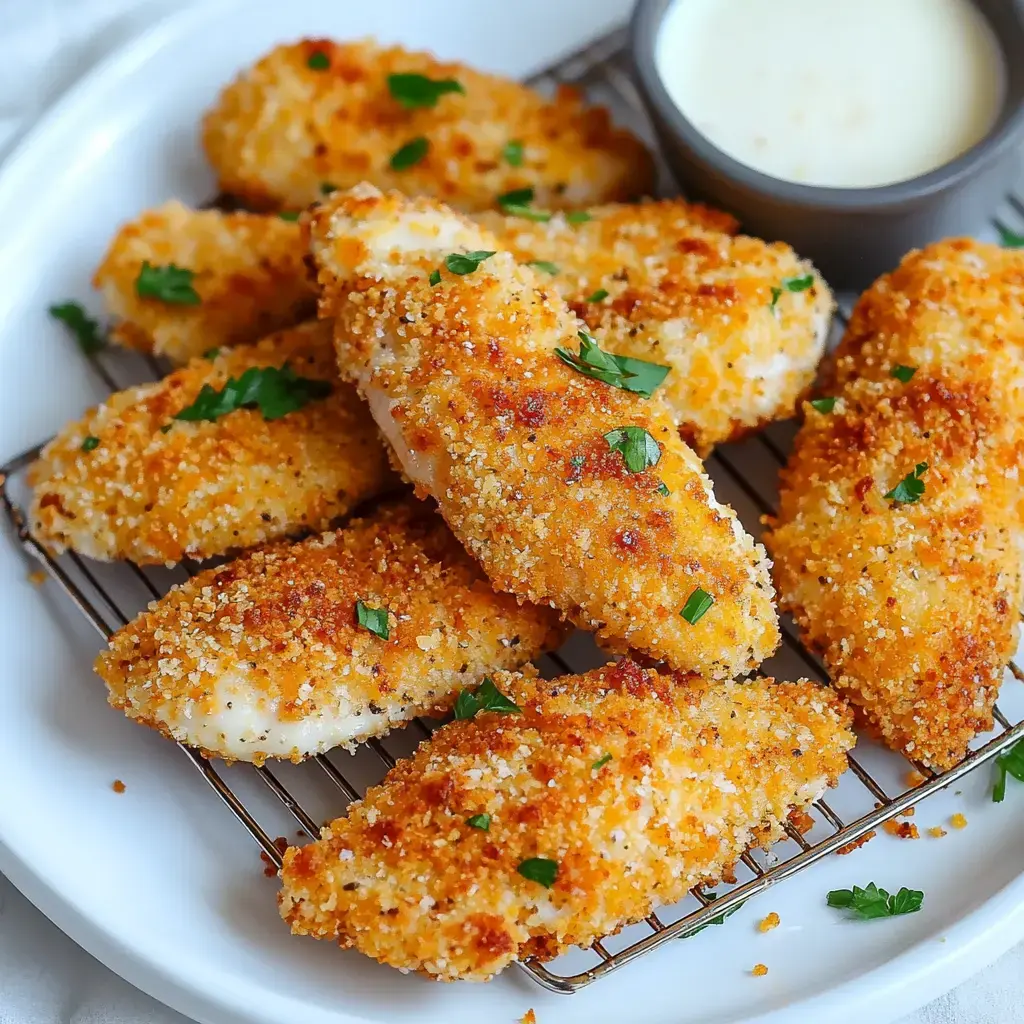
Mouthwatering Cheesy Chicken Strips Everyone Will Beg For
Whenever I whip up these crispy, cheese-coated chicken strips, my home gets filled with incredible smells. The mix of tangy cheddar and parmesan creates this stunning golden outer layer that had my little ones arguing over who got the final piece. Believe me, this turns plain chicken into something amazing without any hard steps or weird ingredients.
How This Recipe Fits Your Busy Life
Even my fussy nephew eats these without complaining. I can quickly make them on hectic evenings when we get home late from practice. They're baked not fried, so there's no messy oil splatter to clean up. They're also great cold in lunch boxes the next day—if you're lucky enough to have any left, which almost never happens at our place.
Your Ingredient List
- Chicken: Go for fresh chicken tenderloins as they cook more uniformly than sliced breast and remain incredibly moist.
- Cheeses:
- 2 cups sharp cheddar cheese newly grated works much better
- 1/2 cup parmesan cheese shredded adds that wonderful savory flavor
- Coating Ingredients:
- 1½ cups all-purpose flour for your first layer
- 1½ cups panko breadcrumbs for that amazing crunch
- 2 large eggs to make everything stick together
- Seasonings:
- 1 teaspoon salt
- ½ teaspoon black pepper
- 1 teaspoon garlic powder
- ¼ cup milk to loosen the egg mixture
- Equipment:
- Baking sheet
- Aluminum foil
- Wire rack if you have one for better crispiness
- Cooking spray
Simple Step-by-Step Guide
- Get Everything Ready
- Start by heating your oven to 400°F. As it warms up, cover your baking tray with foil and put a wire rack on top if you have one. Spray everything with cooking oil so nothing sticks.
- Create Your Coating Area
- Make three separate spots: First bowl mix flour with salt pepper and garlic powder. Second bowl beat eggs with milk till smooth. Third bowl mix panko with both cheeses thoroughly.
- Coat Your Chicken
- Completely dry each chicken piece with paper towels. Use one hand for the dry ingredients and the other for wet stuff. Make sure you cover each piece completely in all three mixtures.
- Put Them On The Tray
- Lay out your coated strips on your prepared tray with room between them. Lightly spray the tops with cooking oil to help them brown nicely.
- Cook Them Right
- If you're using a wire rack, cook for 15-20 minutes without turning them. Without a rack, cook 8 minutes, flip them over, then another 7-12 minutes. They're ready when they hit 165°F inside and look golden brown.
- Finish Up
- Let them sit for 5 minutes after coming out of the oven to keep all the juices inside. Serve them while they're still warm for the best stretchy cheese and crunch.
Tricks For Perfect Results
Using a wire rack really pays off as it lets air flow all around the chicken for total crispiness. Don't skimp on the cooking spray as it really brings out that gorgeous golden color. Adding plenty of seasoning to your flour makes a huge difference in taste. Always cut into the thickest strip to check they're fully cooked through.
 Pin it
Great Sides To Serve With These Strips
These taste amazing next to a bowl of creamy mac and cheese. Sweet honey glazed carrots really balance out the salty chicken flavor. When I want something lighter, I just toss some zucchini on the grill. On special days, I make my garlic parmesan potatoes which go perfectly with these strips.
Handy Advice From My Experience
Those small strips under the chicken breast are the actual tenderloins and they're naturally softer than the rest of the breast. Sometimes I coat a large batch in the morning and keep them in the fridge until it's time for dinner. We love dipping them in ranch while my daughter goes for honey mustard and my husband mixes up his own hot mayo as his favorite sauce.
Frequently Asked Questions
- → Q: Do I need a baking rack?
A: It's handy for keeping chicken crisp without needing to flip, but a foil-lined tray works fine.
- → Q: What about pre-shredded cheese?
A: Shredding your own cheese melts easier and sticks better for even coating.
- → Q: What's the deal with one wet, one dry hand?
A: Stops the coating from sticking together and keeps the process tidier.
- → Q: Can I prep these in advance?
A: They're best super fresh and crispy, but a quick reheat works if needed.
- → Q: Why season the chicken first?
A: Adding seasoning directly to the meat delivers more flavor overall, not just in the coating.